
Published 2023-02-11.
Last modified 2023-10-19.
Time to read: 3 minutes.
av_studio collection.
I have written eighteen articles about Pro Tools. They are somewhat ordered, but largely are meant to be read in any order.
- Pro Tools Overview
- Pro Tools Installation and Preferences
- HUI & MCU
- Pro Tools Keyboards and Hot Keys
- Avid Control, EuControl and EuCon
- Pro Tools Modes and States
- Pro Tools Sessions
- Pro Tools Beats, Bars and Click Tracks
- Pro Tools Operations
- Pro Tools Workspaces and Catalogs
- Pro Tools Sessions
- Pro Tools Editing
- Pro Tools Effects
- Pro Tools Automation
- Pro Tools MIDI
- Pro Tools GrooveCell & Xpand!2
- EZdrummer 3 & Pro Tools
- Pro Tools Issues
I am mastering Music In Montreal; the process ultimately becomes an exercise in applying automation to levels. Automation is used whenever the song is played or rendered. Pro Tools documentation refers to the process of rendering audio to a file as bouncing.
When I saw the following video on Pro Tools automation, I felt like jumping for joy. It is terse in the extreme; every word is significant. Not a millisecond is wasted. I played short segments of it back several times to fully grasp the material.
I often curse at Avid’s support and communication style, but features like this really justify relying on their product.
After spending half an hour practicing each editing capability demonstrated in the video, I became comfortable with those features.
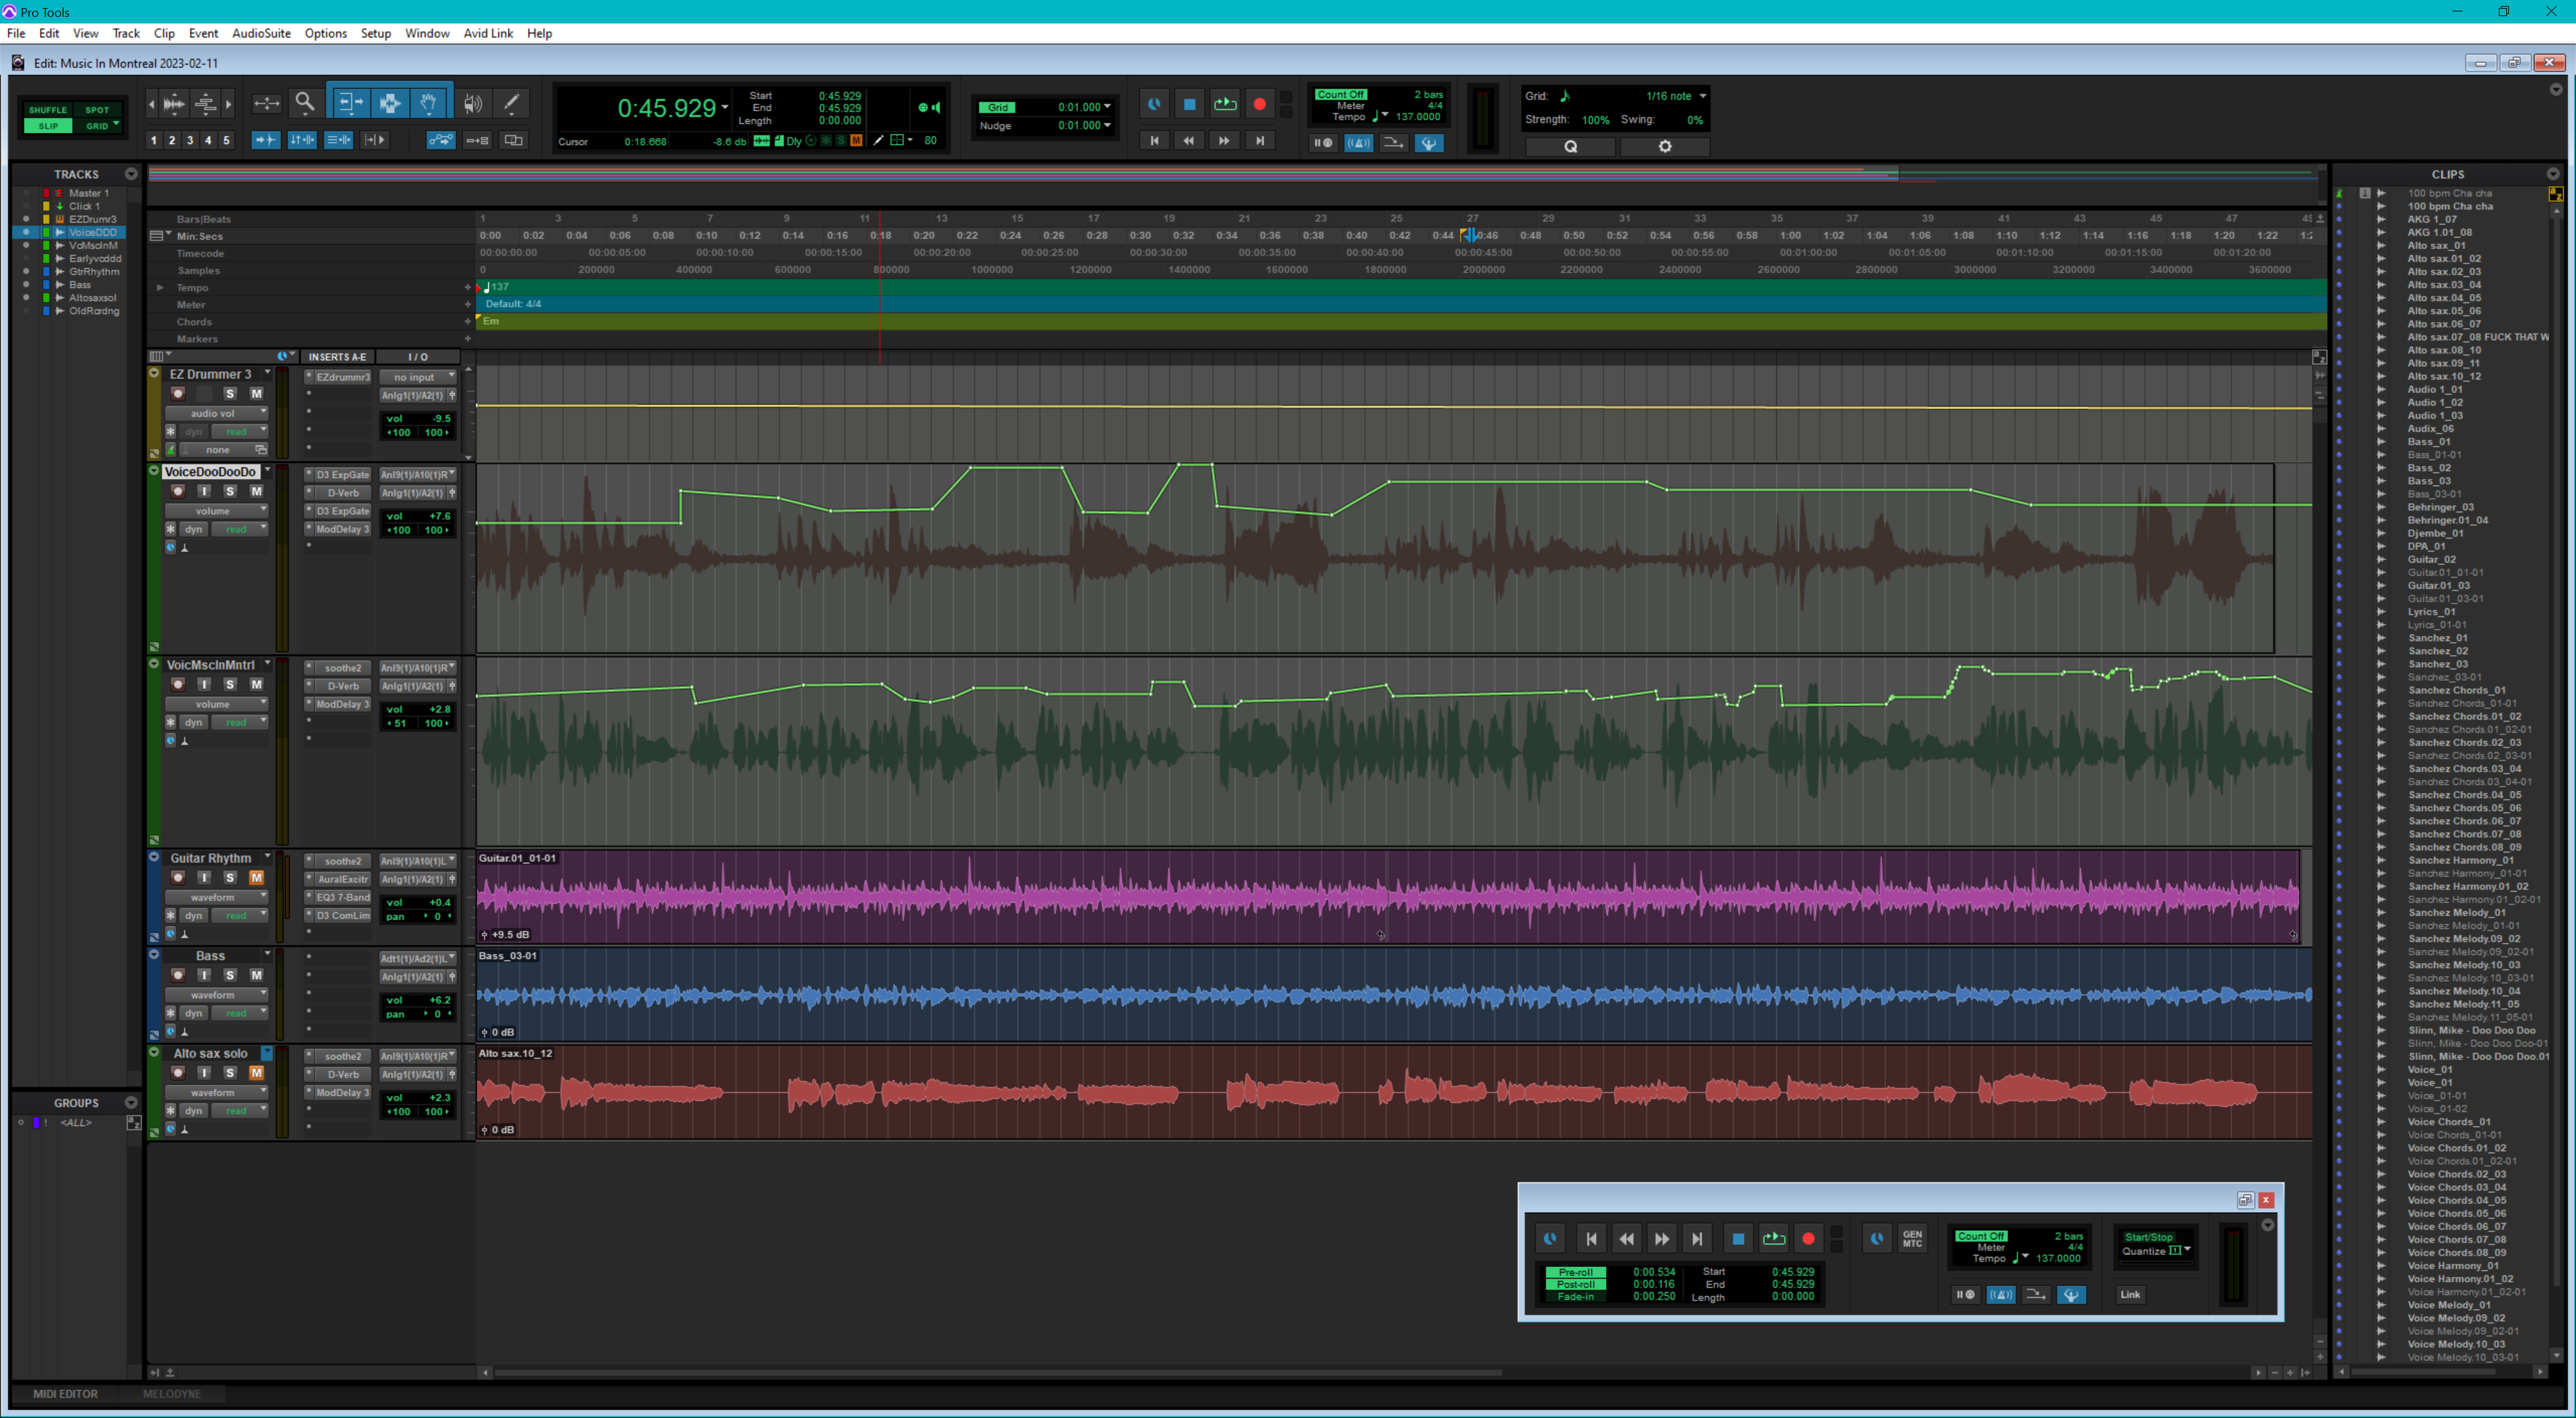
The following is a screenshot of my Pro Tools project. Volume automation is applied to two vocal tracks, which are harmonies. Generally, the volume on one vocal track moves in opposition to the volume on the other track; this provides a consistent volume overall. One of the tracks is panned slightly left, while the other is panned slightly right; this improves separation.
B0rked?
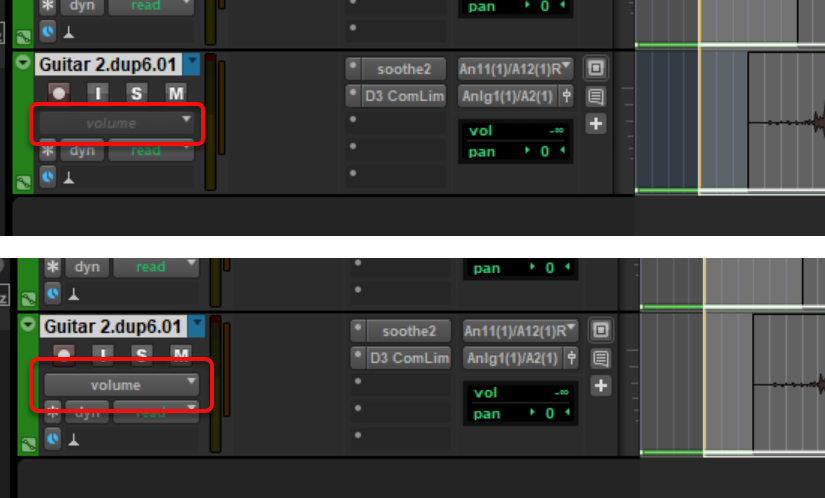
If you see volume envelopes but the automation is not having an effect on the volume, the automation may be disabled. Each track can have volume enabled and disabled separately.
Below are two images showing almost the same track information. The only difference is that the upper image has dimmed the volume text, which indicates that the track as shown in the upper image has disabled automation. CTRL-clicking on the word volume enables the volume automation on that track.
Pro Tools Keymap
As usual for Pro Tools, you must use the numeric keypad’s left‑arrow and right‑arrow keys if you want to slide selected automation nodes forward or backward.
If you have a smaller keyboard, for example, a 10-keyless keyboard, the default key map does not allow you to move selected nodes in this fashion.
Starting with Pro Tools 2022.4 you can create your own custom key map. For Windows, type Start-Shift-K to see and modify the key map. For Mac, type CTRL-Shift-K instead.

Mute
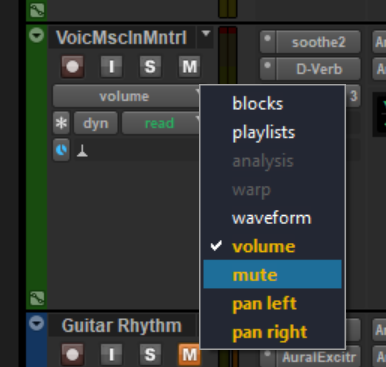
BTW, while learning, I somehow inadvertently added automation to mute, which caused dropouts. That was due to user error, I am sure.
It was easy to delete the mute automation once I realized that it was the problem.
MIDI Volume, Pan, & Mute
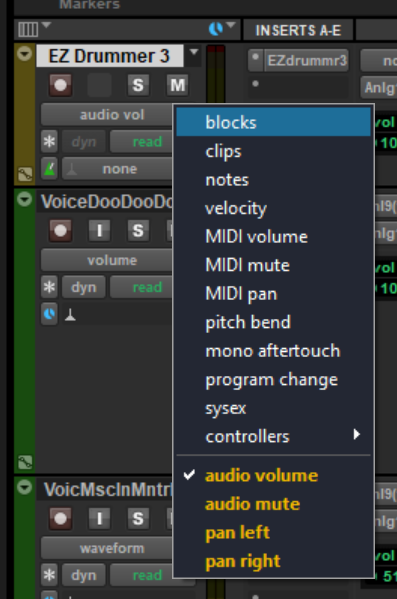
MIDI tracks (and their cousins, instrument tracks) have slightly different automation options than audio tracks do. The image to the right shows the automation options for EZ Drummer3, a virtual MIDI instrument.
MIDI tracks rename and repackage volume, pan left, pan right and mute automation as audio volume, audio pan and audio mute automation, respectively. This, unfortunately, just adds confusion without providing benefit.
MIDI tracks also provide MIDI volume, MIDI pan and MIDI mute, plus more MIDI-specific automation.
For MIDI channels and MIDI instruments, use audio volume and audio pan to automate the mix.
Some MIDI instruments sound differently when played at different volumes. MIDI volume and MIDI pan control the MIDI instrument itself. Most of the time, you would not use MIDI volume or MIDI pan, however.
I have written eighteen articles about Pro Tools. They are somewhat ordered, but largely are meant to be read in any order.
- Pro Tools Overview
- Pro Tools Installation and Preferences
- HUI & MCU
- Pro Tools Keyboards and Hot Keys
- Avid Control, EuControl and EuCon
- Pro Tools Modes and States
- Pro Tools Sessions
- Pro Tools Beats, Bars and Click Tracks
- Pro Tools Operations
- Pro Tools Workspaces and Catalogs
- Pro Tools Sessions
- Pro Tools Editing
- Pro Tools Effects
- Pro Tools Automation
- Pro Tools MIDI
- Pro Tools GrooveCell & Xpand!2
- EZdrummer 3 & Pro Tools
- Pro Tools Issues


