
Published 2020-03-01.
Last modified 2025-02-15.
Time to read: 9 minutes.
av_studio collection.
I have written eighteen articles about Pro Tools. They are somewhat ordered, but largely are meant to be read in any order.
- Pro Tools Overview
- Pro Tools Installation and Preferences
- HUI & MCU
- Pro Tools Keyboards and Hot Keys
- Avid Control, EuControl and EuCon
- Pro Tools Modes and States
- Pro Tools Sessions
- Pro Tools Beats, Bars and Click Tracks
- Pro Tools Operations
- Pro Tools Workspaces and Catalogs
- Pro Tools Sessions
- Pro Tools Editing
- Pro Tools Effects
- Pro Tools Automation
- Pro Tools MIDI
- Pro Tools GrooveCell & Xpand!2
- EZdrummer 3 & Pro Tools
- Pro Tools Issues

These instructions are for members of the World Peace Musical Collective. It may be of interest to others as well.
Creating a New Pro Tools Session
-
File / New (CTRL-N), ensure that Create from Template is enabled,
and select the Default template, which Mike made.
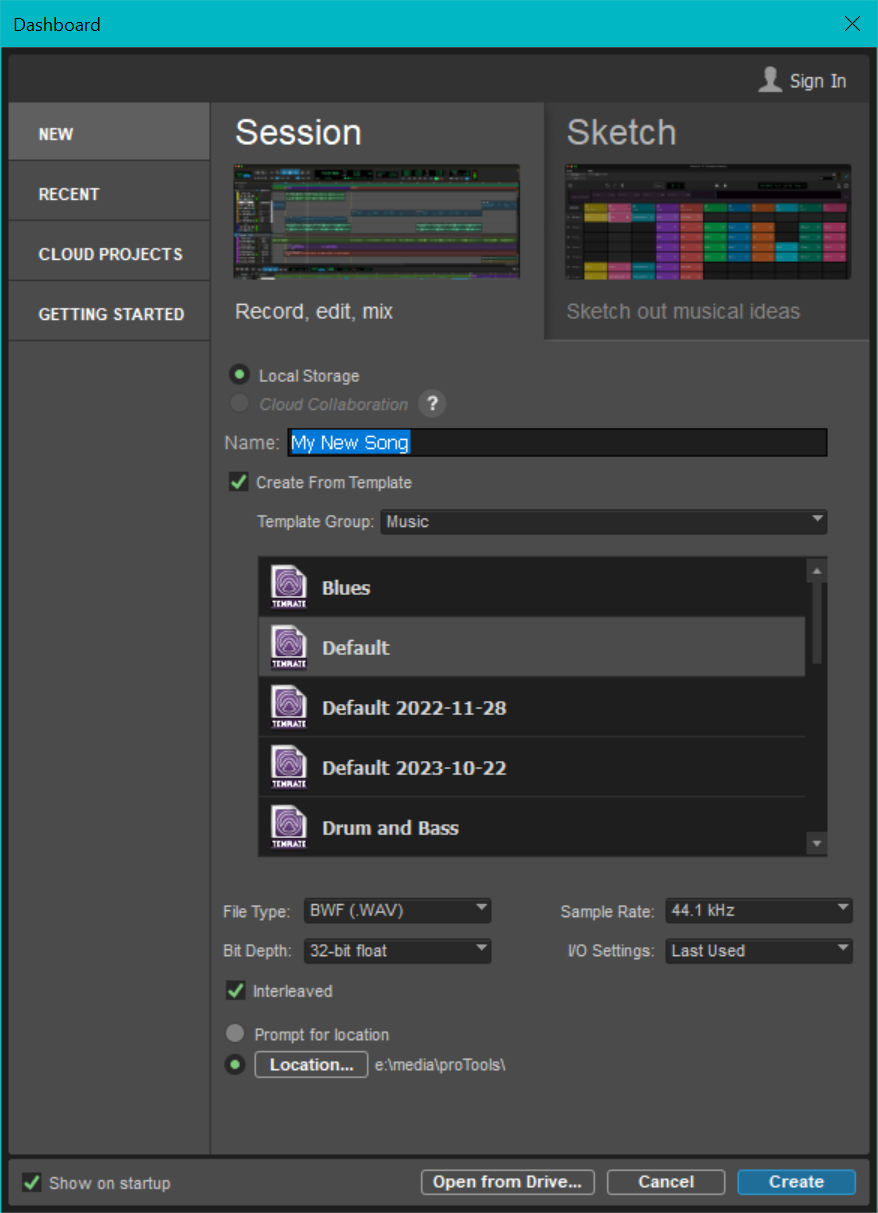
- Name the song. The image above shows that the new song will called My New Song.
- Ensure Interleaved is enabled.
-
Ensure Location... is set it to
E:\media\proTools\. -
Click on Create.
This makes a new directory of that name,
and within it, a file of that name with the
.ptxfile type.
Songwriter Templates and Launchkey 49
The Pro Tools Songwriter Templates are very well done. When creating a new session, you can choose a template as a starting point by enabling Create From Template.

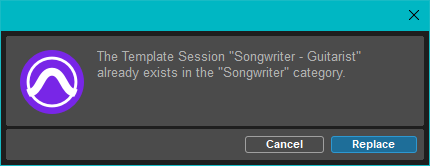
After I pressed the Create button, I saw:

This showed me that the template came from an old version of Pro Tools, and the settings for the RME Fireface driver for my old Fireface UFX had not been updated with the new RME MADIface driver for the new Fireface UFX III.
The templates combine perfectly with the Novation Lauchkey 49.


Mouse over to enlarge this image
The template directory is discussed in Pro Tools Settings Directories.
Modifying a Template
The Pro Tools templates are really great, but they would be even better if the I/O was assigned for my setup. Templates cannot be directly modified, but you can change them this way:
-
Create a new session from the template you want to modify.
I give the new session the same name as the template it was created from;
this is the default name, so that is easy.
Remember the category it was taken from.
It is important not to clutter the template directory tree with the many files associated with Pro Tools sessions. I save sessions that are intended to become templates inE:\.media\ template_sessions
For example, the to modify the template called Songwriter - Guitarist, I save the new session toE:\media\ template_sessions\ Songwriter - Guitarist - Adjust the session settings such as I/O assignments, tracks and instruments as desired.
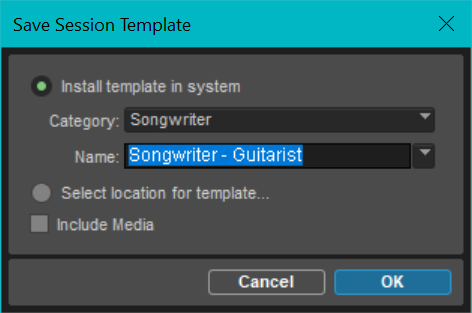
- Save the session
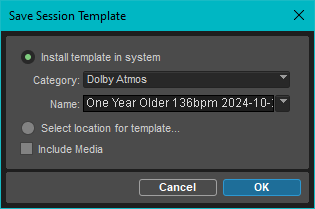
- File / Save As Template
- Choose the same category as before.
-
Save into the user template directory mentioned above (this is the default directory).
Modifying Songwriter - Guitarist
For example, I wanted to make the following I/O assignments in the templates that I use:
| Channel Label | Channel Name | Pro Tools Track(s) |
|---|---|---|
| GLXD6 B | ADAT 2 | Rhythm Guitar and Lead Guitar |
| U87 Silver | AN 9 | Male Vocal |
| U87 Black | AN 10 | Female Vocal |
| Output | AN 1/2 | Main out |

Creating A New Track
Create a new track with CTRL-SHIFT-N. If the track is created with its time base set to ticks, then its start position and length will adapt to tempo changes. Tracks with their time base set to ticks will display a small green metronome. This is the default for new Instrument and MIDI tracks, but not for new audio tracks.
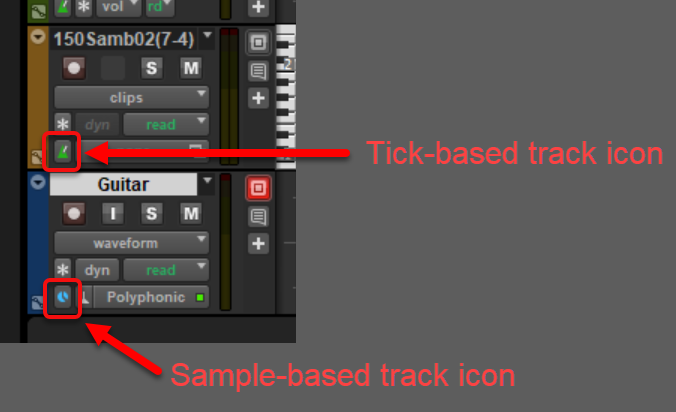
Tracks with a time base set to ticks will conform to the session tempo, with content on those tracks maintaining a fixed bar and beat position, taking any session tempo changes into account. Tracks with a time base set to samples will maintain a fixed position in relation to the session start.
If you want to experiment with different tempos for a song, first ensure that all the tracks that are not muted have their time base set to ticks. Otherwise, the tracks will become misaligned when the tempo is changed.
Clicking on the time base icon for a track will show the time base options, and you can change them:
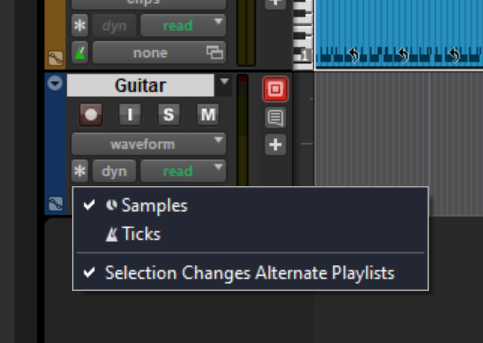
Notice that each clip in a playlist can have a different time base. This might cause confusion, so watch out for the time base changing when a different playlist clip is activated.
Preferences / Editing / New Tracks Default To Tick Timebase is disabled by default. If you want all new tracks to be set to the tick time base, enable this setting. I leave it disabled.
Here is an excellent video on the topic, which also discusses and demonstrates elastic audio for audio tracks.
The above video is 10 years old. The factory settings for the current version of Pro Tools defaults to applying polyphonic elastic audio to new audio tracks.
The following are related factory settings for Pro Tools; they should be appropriate for most situations:
- Preferences / Processing / Drag and Drop From Desktop Conforms to Session Tempo should be set to REX and ACID files only.
- Preferences / Processing / (Elastic Audio) Default Plug-in should set to Polyphonic.
- Preferences / Processing / (Elastic Audio) Enable Elastic Audio on New Tracks should be enabled.
See Pro Tools Setup for additional settings.
Adding a Master Fader Track
This is a good thing to add to your Pro Tools templates.
- Open the New Tracks dialog by pressing CTRL-Shift-N.
- Select Stereo instead of Mono.
- Select Master Fader.
- Select Samples.
- The default name, Master, is probably a good name for the track.
- Hide the new track in the edit window by right-clicking on its title and selecting Hide.
Lyrics
Pro Tools does not have proper support for lyrics; however, this workaround works well.
- Create an audio track called Lyrics and place it above the lead vocal track.
- Set the height of the new lyrics track to Small so it is easy to select. Windows-down arrow is a quick way of reducing the height of the currently selected track. Use Windows-up arrow if you need to increase the height of the currently selected track.
- (Optional) Deactivate the new lyrics track; if you want to color selected phrases, do not deactivate the track. I normally leave the lyrics track deactivated, and only activate it when the singer wants to use the lyrics track.
For each phrase of the lyrics:
- Highlight the area you want to place a phrase of lyrics at. I tend to make the area exactly one bar long, corresponding to one line of the lyrics; enabling grid mode helps.
- Use consolidate (ALT-SHIFT-numeric pad 3) to create an empty audio clip.
- Rename the audio clip using CTRL-ALT-SHIFT-R, which is the hotkey for Clip / Rename.
Once the lyrics are done, set the height of the new lyrics track to Micro. Use Windows-up arrow to increase the height of the currently selected track.
Brick Wall Limiters
It is a good idea to put a brick wall limiter on the master track. If the mix has large volume changes, use several limiters, and set each one for no more than 2db of gain reduction.
Most compressor limiters are not lookahead limiters; for maximizing levels, use a brickwall limiter, which have an infinite ratio.
- Something to check out: George Yohng’s free W1 limiter.
- Waves L2 is supposed to be good (User Guide). Sound-on-Sound review. The maximum dynamic range is 24-bit.
- Maxim (included with Pro Tools) is supposed to be awful.
- Avid Dynamics III is included with Pro Tools. It has no lookahead, so is not useful as a brickwall limiter.
Visibility Settings
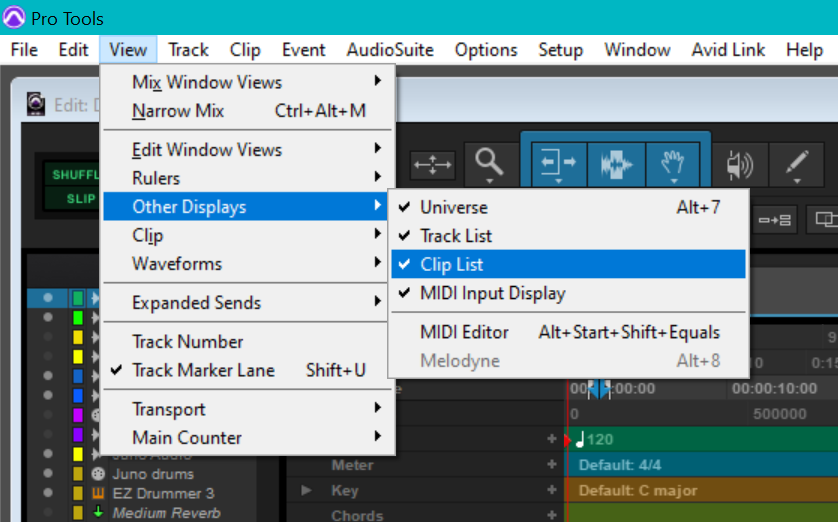
Display the clip list, and perhaps the MIDI editor if you are working a lot with MIDI data:
I like to maximize the edit window, and only show the mixer window when required. Press CTRL-= to toggle the visibility of the mixer window.
Templates
To save an open session as a template for new sessions, select File / Save As Template.... By default, the audio and MIDI data is not included in templates, unless the Include Media option is enabled.
Templates can be stored in the Pro Tools template folder, which is the default, or in any other folder.
I prefer to store them in a directory that I control, E:\,
because performing system backups is easier when you can backup entire directories without having
to keep track of individual files.
It is usually best to leave Include Media unchecked.
Make A PlayAlong Project
- Copy from template as above. The template must be set to 48 kHz, or the MP3 will play back too quickly, and will be pitch-shifted!
- Drag an MP3 into blank space at the bottom of the Pro Tools menu.
Add MP3
The template must be set to 48 kHz, or the MP3 will play back too fast!!!
- Drag from Windows File Explorer or from MusicBee into the Track panel (left-most panel).
- Move the new track to the top.
-
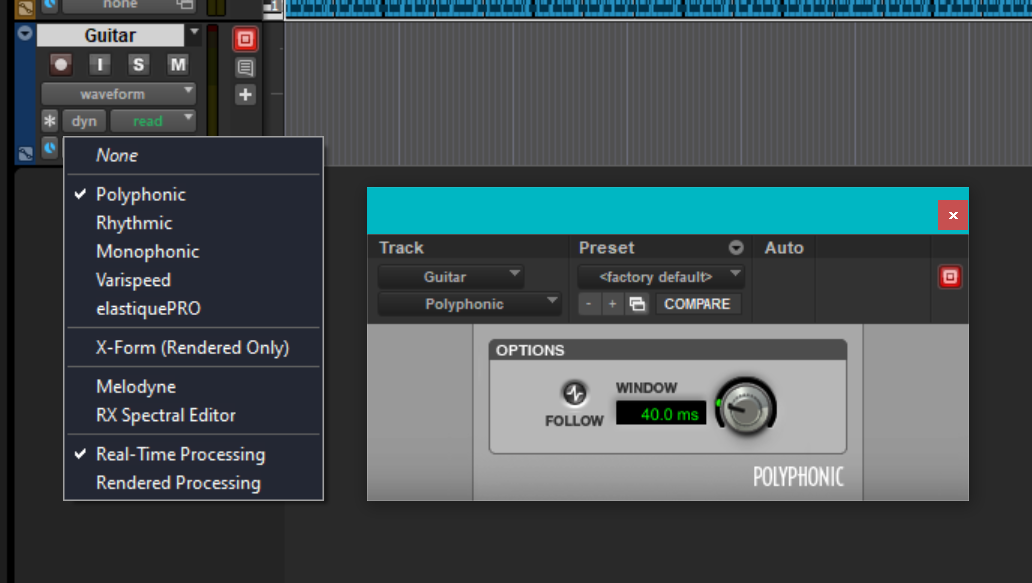
Click in a blank area to the left of the track. You will know that you are in the right area because the Current Elastic Audio or ARA Plug-in tooltip will appear as you hover over the area:
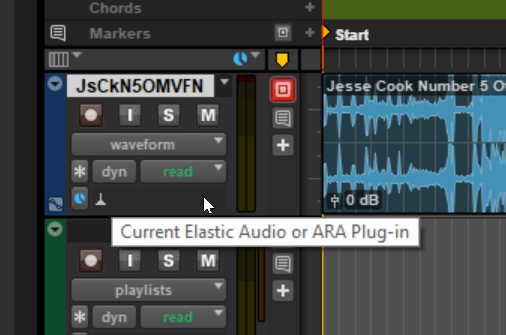
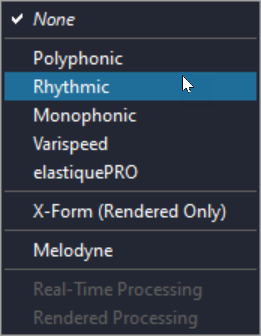
-
You now have several choices. Try the Polyphonic and Rhythmic options.
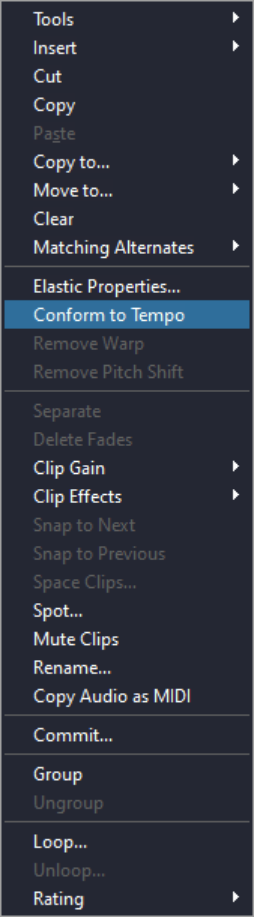
-
Right-click on the track and select Conform to Tempo and Remove Warp, if enabled, or the clip will play back too fast.
Record A Track
- Take safety off (green I)
- Record arm the track (Audix, for example)
- Record arm the project
- Play to record (or space bar)
Multiple Takes
Use playlists for multiple takes. To add new playlist(s) to selected tracks:
- Select the track by clicking on the track names in the edit window. Use the normal Windows Shift-click and Control-click to extend the selection.
-
Use Win-\ to move the current waveform into a new playlist entry.
As always in Pro Tools, the ALT key means “do this to all”,
and Shift means “do this to selected”, so:
- Win-ALT-\ creates a new Pro Tools playlist on all tracks (including inactive ones).
- Win-ALT-Shift-\ creates new playlists only on selected tracks.
- Once there are multiple takes, listen to them one at a time by soloing any given take.
- To copy a selected portion of a solo’d take into the waveform, click the up arrow for that take.
-
Use Win-\ to make a new take from the waveform, and name it with
.c(consolidated) suffix.
Loop Recording
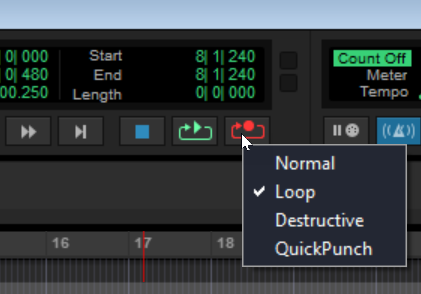
Looping over a portion of a song while recording take after take is a good way to finally get a difficult passage.
ALT-L toggles loop recording. You can also right-click on the recording button to enable loop recording.
Other important settings to make this work property are:
- Grid mode
- Selector tool
- Main counter set to Bars | Beats
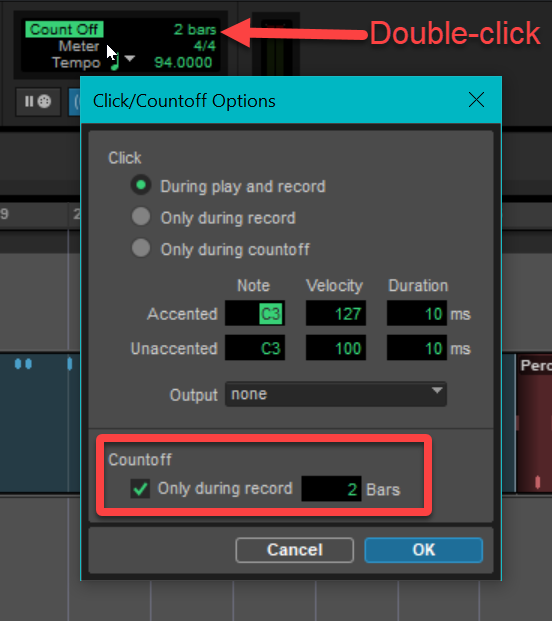
- Grid is active (solid green) and set to 1 bar
- Enable count off (2 bars, for recording)


Now that everything is set for loop recording:
- Select the track(s) to record on (Control-click on the track names)
- Make a new take for the selected tracks (Win-ALT-Shift-\)
- Record-arm the track(s) to record on
- Select some bars, anywhere on the edit area, to record into.
- Control-space to start loop recording.
- Space when you have enough loops recorded
Modify Group of Tracks
-
Right-click on the group to modify.

-
Click on Modify…

-
Select the tracks to add / remove to / from the group:
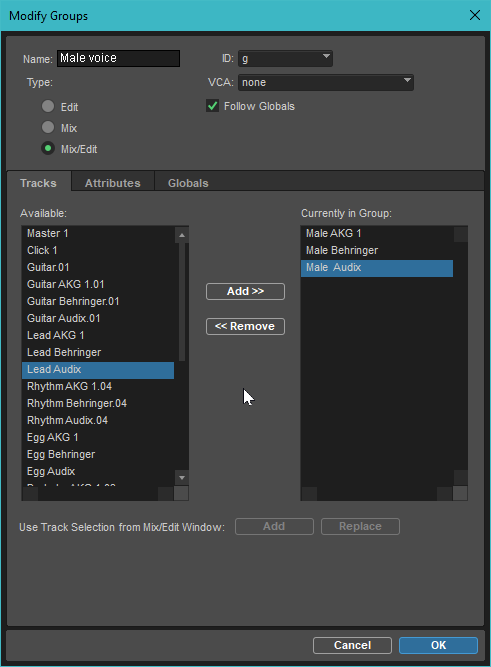
- Click the Add >> or << Remove buttons, as appropriate.
Audio Clips
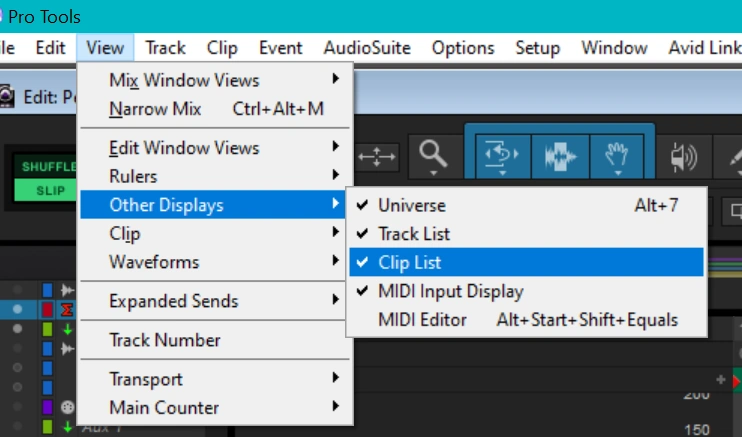
The audio clips for a project can be displayed by enabling View / Other Displays / Clip List.
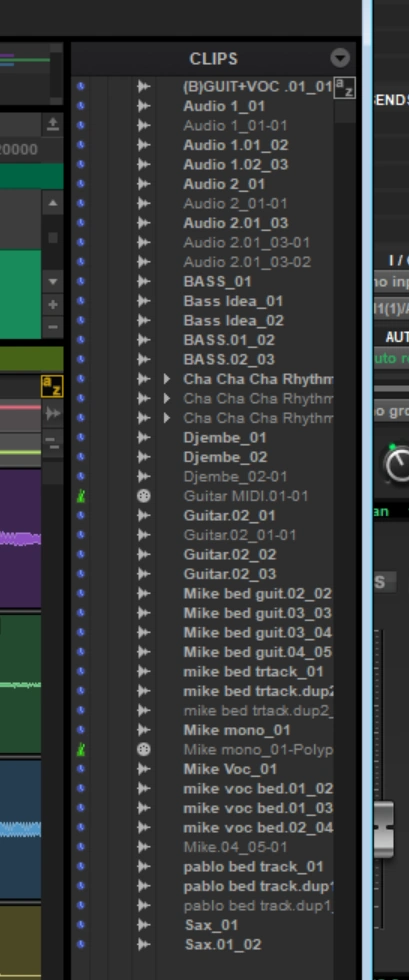
This is what the clip list might look like:
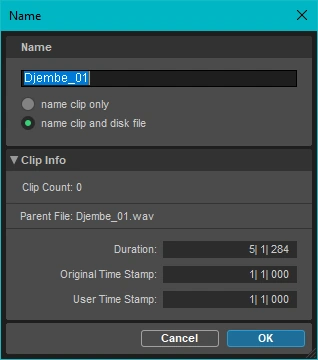
Double-click on an item in the clip list to see the click menu, which allows you to rename the clip, or the clip and the file it is stored in, and to view information about the clip.

Right-click on an item in the clip list to see the click context menu.
Reset Song Start
When tick-based tracks are moved, any associated tick-based markers will follow, but markers referencing absolute timebases (like sample-based tracks) will be unaffected.
Pro Tools: Losing Time has a good in-depth explanation of defining the start of a song. Following is an abbreviated set of directions:
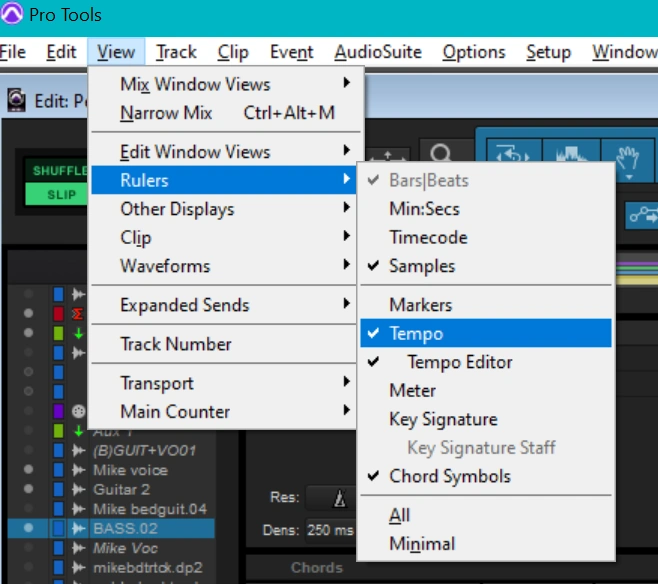
The Song Start marker is a red diamond, which is usually only half-visible on the extreme left of the Tempo ruler. Use the View / Rules / Tempo menu to toggle visibility of the Tempo ruler.
You can move the Song Start marker without moving markers, tempo data, etc. For Windows, hold Win-Shift while dragging the Song Start marker; for Mac, hold CTRL-Shift while dragging the Song Start marker.
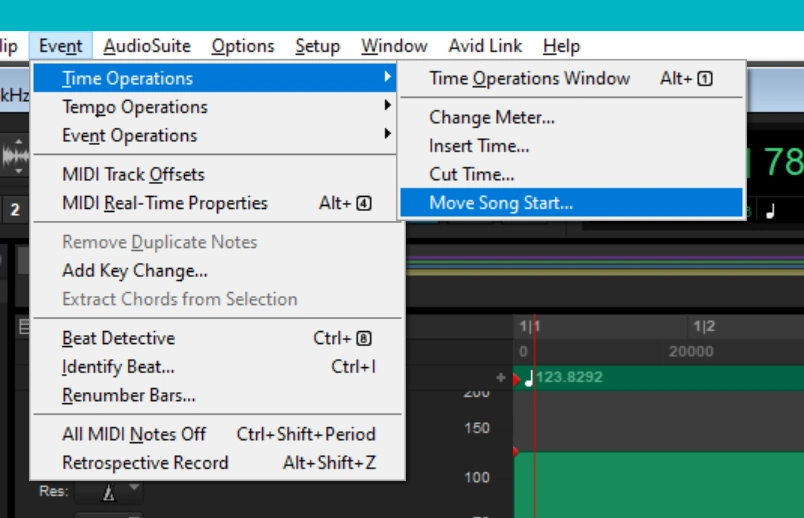
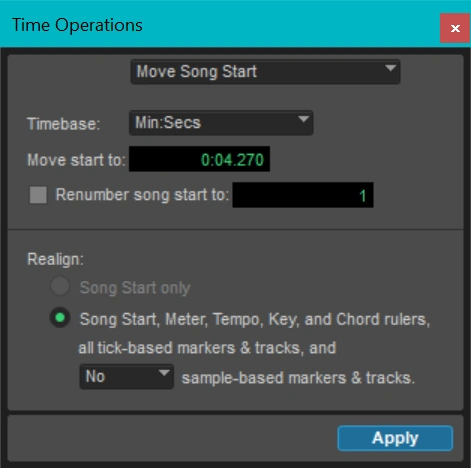
Another way is to use the Event / Time Operations / Move Song Start ... menu item to reset the start of the song to the cursor location.
I have written eighteen articles about Pro Tools. They are somewhat ordered, but largely are meant to be read in any order.
- Pro Tools Overview
- Pro Tools Installation and Preferences
- HUI & MCU
- Pro Tools Keyboards and Hot Keys
- Avid Control, EuControl and EuCon
- Pro Tools Modes and States
- Pro Tools Sessions
- Pro Tools Beats, Bars and Click Tracks
- Pro Tools Operations
- Pro Tools Workspaces and Catalogs
- Pro Tools Sessions
- Pro Tools Editing
- Pro Tools Effects
- Pro Tools Automation
- Pro Tools MIDI
- Pro Tools GrooveCell & Xpand!2
- EZdrummer 3 & Pro Tools
- Pro Tools Issues


