
Published 2020-08-22.
Last modified 2022-08-22.
Time to read: 4 minutes.
av_studio collection.
I have written eighteen articles about Pro Tools. They are somewhat ordered, but largely are meant to be read in any order.
- Pro Tools Overview
- Pro Tools Installation and Preferences
- HUI & MCU
- Pro Tools Keyboards and Hot Keys
- Avid Control, EuControl and EuCon
- Pro Tools Modes and States
- Pro Tools Sessions
- Pro Tools Beats, Bars and Click Tracks
- Pro Tools Operations
- Pro Tools Workspaces and Catalogs
- Pro Tools Sessions
- Pro Tools Editing
- Pro Tools Effects
- Pro Tools Automation
- Pro Tools MIDI
- Pro Tools GrooveCell & Xpand!2
- EZdrummer 3 & Pro Tools
- Pro Tools Issues
Setup For Beats and Bars
Many types of grids and quantizations are available. For looping to work properly, several settings must be set to beats and bars. The process is not obvious.
-
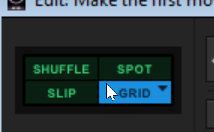
Ensure Grid mode is enabled.
-
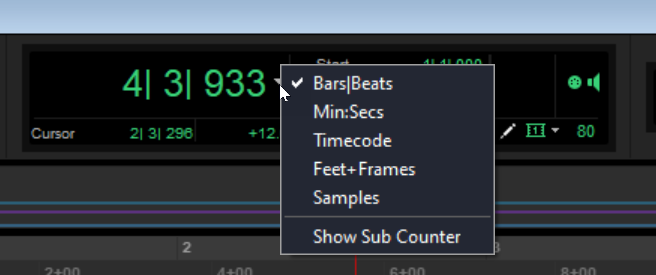
The display must be set to Bars|Beats.
-
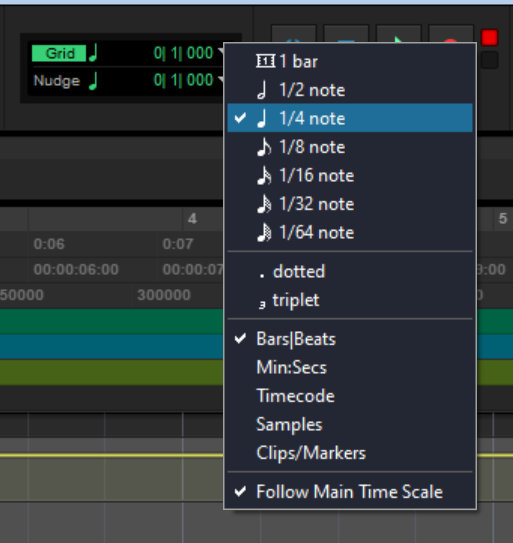
Ensure the grid is active and quantized to something reasonable, perhaps quarter note (‘crochet’, for UK readers) intervals.
-
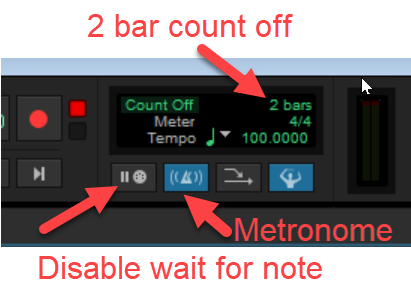
Set a count off and disable wait for note. This gives the musician a chance to get ready before starting, instead of starting recording when the first note is played.
-
If you just want the count-in,
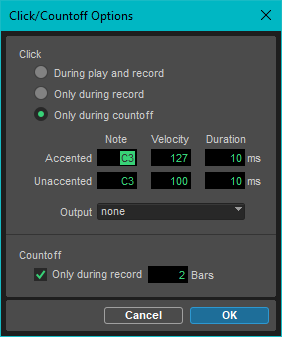
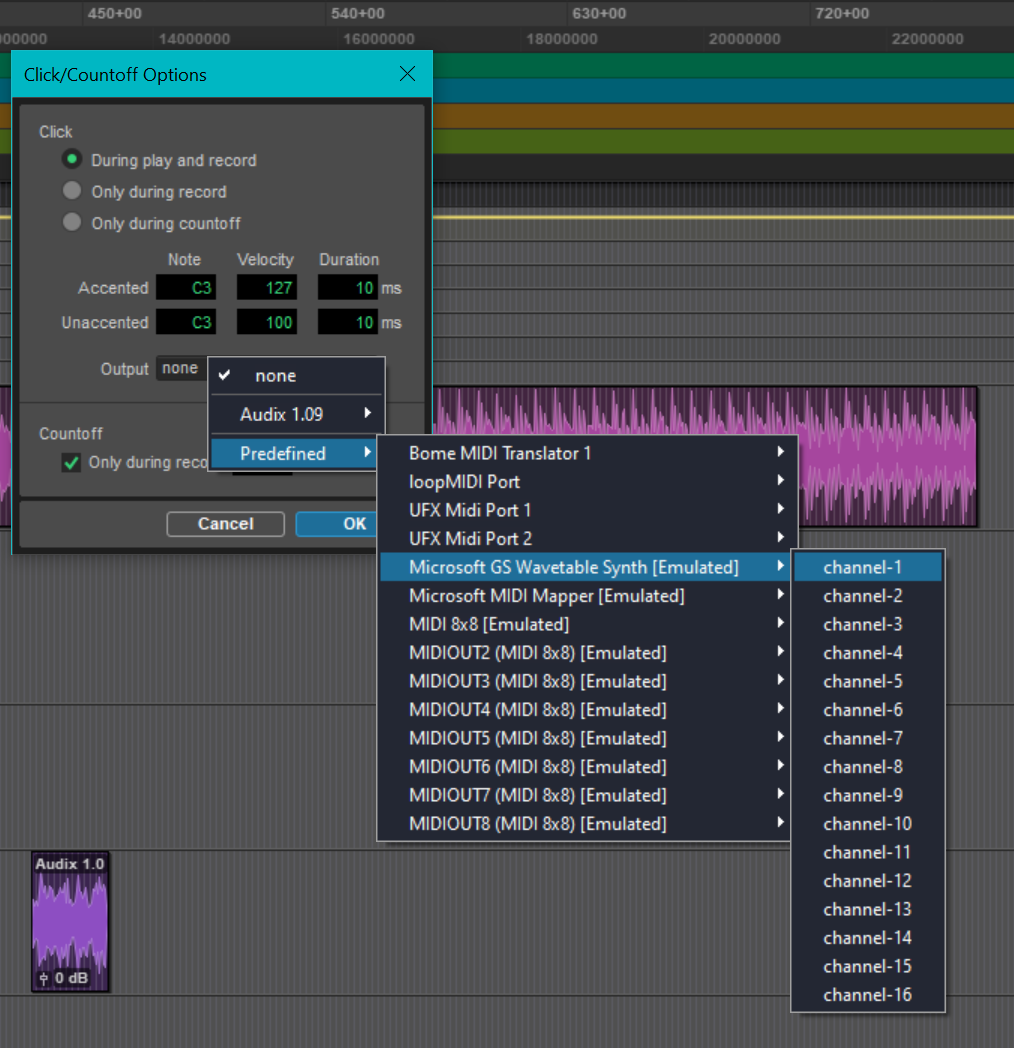
but no metronome after that, disable the metronome, and double-click where the count-in bars are shown. The image shows what you should expect. Set Click to Only during countoff, and enable Countoff only during record.
Count In
A click track must exist before count-in is possible.
Make a Click Track
To make a click track, select the Track / Create Click Track menu, as shown in the image below.
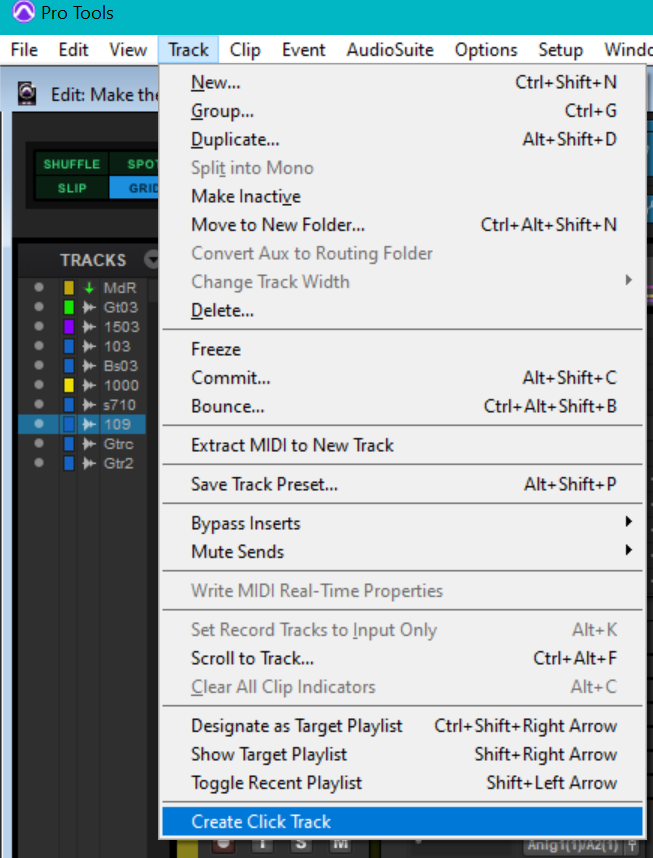
The track will be called Click N, where N starts at 1 for the first click track in the song. The new click track will be selected, and any other previously selected tracks will be deselected.
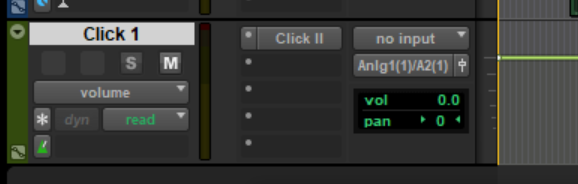
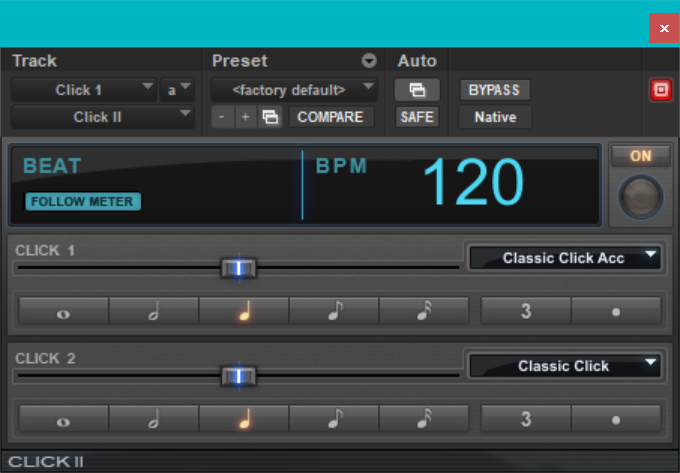
Click tracks are actually normal tracks that have an AAX plugin called Click II. To learn more about Click II, see Chapter 62 (pages 378–380) of the Pro Tools Audio Plug-ins Guide. Left-click on the insert, and the Click II settings will appear, as shown below.
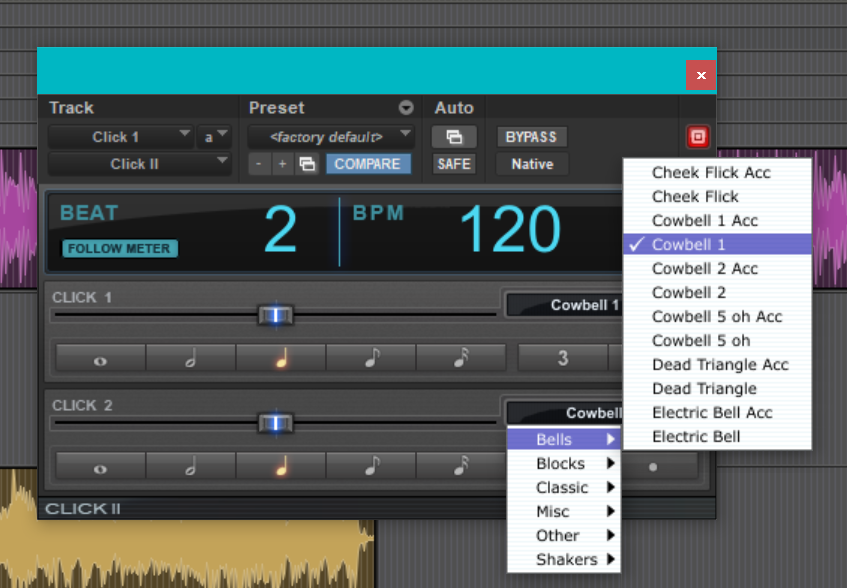
You can select different sounds for the click track by clicking on Classic Click and Classic Click Acc. Each of the preset sounds has two versions: the normal version (Classic Click), for Click 1, and the accented version, which is louder (Classic Click Acc), for Click 2. Both sound the same except for volume. Both Click 1 and Click 2 have independent volume sliders.
The following image shows me selecting cowbells for the click sounds.
Another setting for the Click II insert is Follow Meter, in blue. Leave that enabled. In the next step, we will set the meter. The two rows of buttons with notes in them only work when Follow Meter is disabled. Let’s not go there.
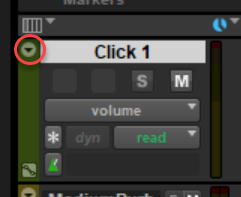
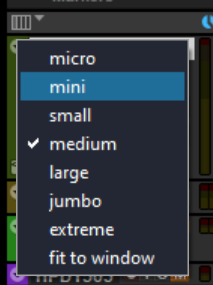
Once the click track is configured, you could make it really thin by clicking on the down arrow, then selecting micro or min.
Configure Count In
Right-click anywhere within the red area at the top of the window and enable MIDI Controls.
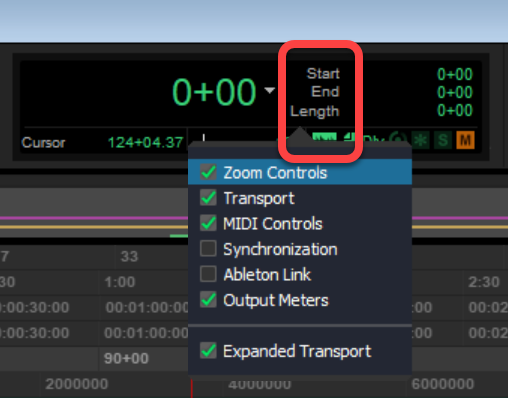
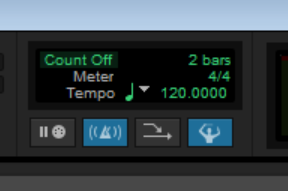
A new area opens up to the right of where you are working, as shown in the rightmost image above.
You can turn off the click track at any time, even when playing, by clicking on the little blue square with a metronome in it.
The tempo of the song can be set by clicking on the number (120.0000 in the image above right) and typing in a new number, for example, 100 (for 100 beats per minute). For variable tempo, see Setting Tempo And Advanced Tempo Changes.

Double-clicking on the value of the Count Off (2 bars in the image above) brings up the Click / Countoff Options dialog, as shown to the right. Here you can establish when the click track can be heard (just for recording, just for playing, or both) and how many bars of lead-in the click track will play when recording.
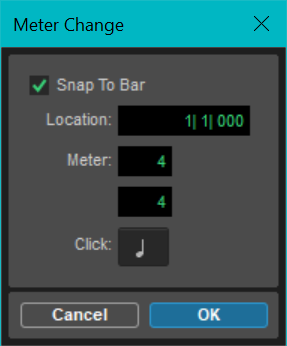
Double-clicking on the value of the meter (4/4 in the image above right) brings up the Meter Change dialog, shown on the right.
The clicks can be sent to MIDI devices with the Output selector.
I have written eighteen articles about Pro Tools. They are somewhat ordered, but largely are meant to be read in any order.
- Pro Tools Overview
- Pro Tools Installation and Preferences
- HUI & MCU
- Pro Tools Keyboards and Hot Keys
- Avid Control, EuControl and EuCon
- Pro Tools Modes and States
- Pro Tools Sessions
- Pro Tools Beats, Bars and Click Tracks
- Pro Tools Operations
- Pro Tools Workspaces and Catalogs
- Pro Tools Sessions
- Pro Tools Editing
- Pro Tools Effects
- Pro Tools Automation
- Pro Tools MIDI
- Pro Tools GrooveCell & Xpand!2
- EZdrummer 3 & Pro Tools
- Pro Tools Issues


