Published 2022-01-07.
Last modified 2023-03-27.
Time to read: 6 minutes.
av_studio collection.
This article walks through setting up OBS Studio to stream to Facebook Live from a Windows laptop or desktop. Much of this material also applies to Macs. This article does not discuss streaming from mobile phones or tablets, just computers.
Is Your Computer Powerful Enough?
In 2023, modern laptops and desktops were yesterday’s supercomputers.
Your computer should have an NVIDIA RTX GPU – any model; they are all more than adequate. GTX GPUs also function; however, your computer will work harder than if an RTX GPU was used, and some features, such as background removal, will not be available or reliable.
When live-streaming from your PC, do not connect over Wi-Fi. Instead, use an Ethernet cable for a more stable connection.
I build my own PCs. Late in 2022, I carefully spent about $2500 USD on upgrading an old box to what, I thought, was the best compute per dollar value. The power of the updated computer is completely ridiculous. Incredible value! I now laugh in the face of significant computation. Real-time audio and video generation and streaming of arrays of symphonies are now possible.
Facebook Live Format Recommendations
Facebook’s live video format recommendations are:
- The video bitrate should be between 3,000 and 6,000 Kbps (3-6 Mbps). However, I found that OBS Studio limited the video bitrate to 4,000 Kbps (4 Mbps) for Facebook Live.
- The video resolution should be 1080p (1920 x 1080) at 30 fps.
- A keyframe should be sent every 2 seconds and not more than 4 seconds.
- Audio should be in stereo, with a 44.1 kHz sample rate. Audio must be AAC encoded (low complexity); 128 Kbps is recommended. OBS Studio limits the audio bitrate for Facebook Live to 128 Kbps.
- Video should be encoded as H.264, Level 4.1. However, Level 4.2 for 1080p at 60 FPS is also supported.
Read Facebook’s more detailed recommendations.
OBS Studio Configuration
You can configure OBS Studio to start recording when streaming starts, by going to File / Settings, then selecting the General tab:

I recommend you do not make this setting at first, or your hard drive will be full of useless videos while you get used to how things work. Instead, practice with this disabled and enable it when you can get things done efficiently.
OBS Studio Output Configuration
This panel can be accessed at File / Settings, then selecting the Output tab. It shows two choices for Output Mode: Simple and Advanced. Select Advanced; you now see four tabs below Output Mode. This is how I configured OBS Studio’s Output.
Streaming Tab
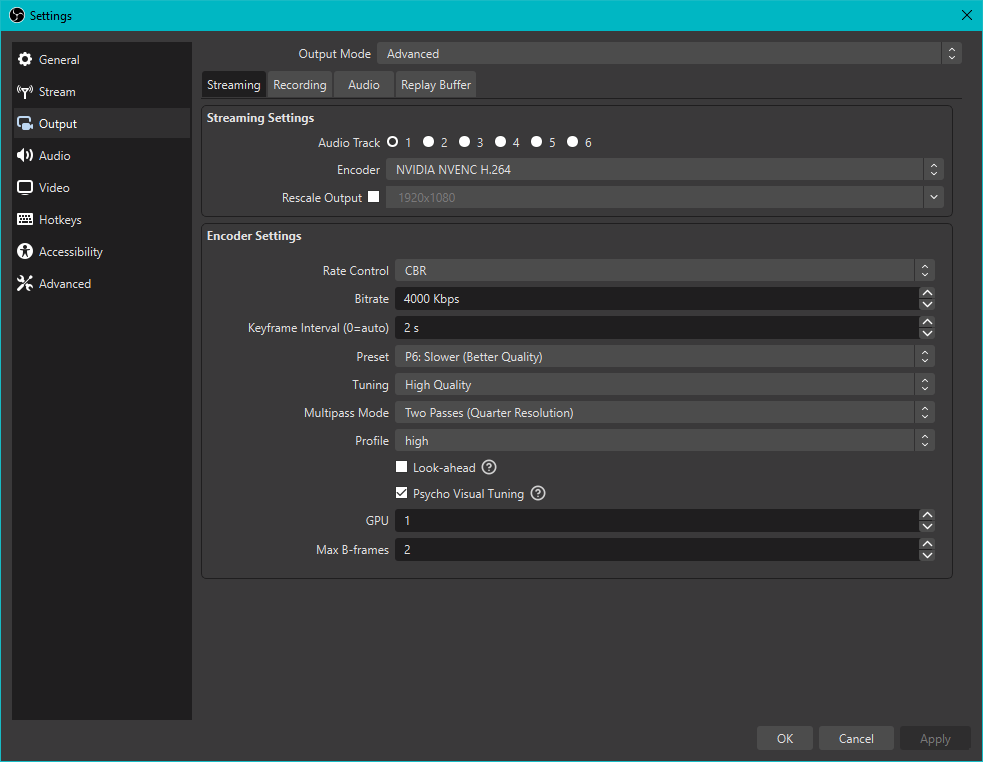
- Audio Track: 1
- Encoder: NVIDIA NVENC H.264
- Rate Control: CBR
- Bitrate: 4000 Kbps
- Preset: P6: Slower (Better Quality). P5-P7 are close in performance. The difference in quality between them is also not significant and is only a few percent (depending on the content). You can use P7 at up to 2K resolution.
- Tuning: High Quality
- Multipass Mode: Two Passes (Full Resolution). The default is Two Passes (Quarter Resolution), which unfortunately is not supported on GPUs built from older Maxwell and Kepler architectures.
Recording Tab
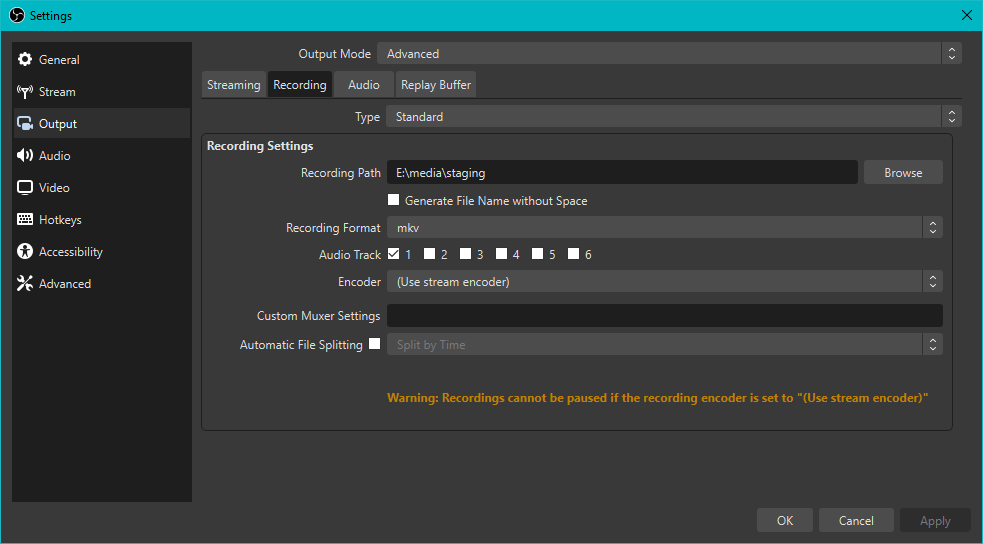
The only change I made on this tab was to set the Recording Path.
Audio Tab
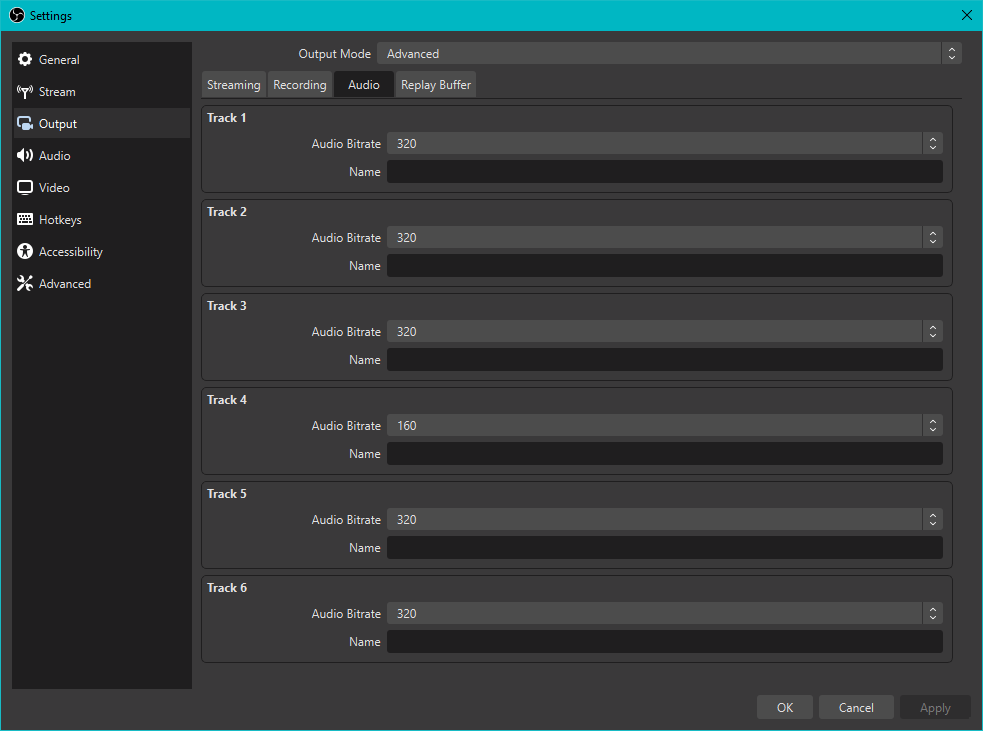
The only change I made on this tab was to set the Audio Bitrate to its maximum value, 320. I stream music videos, so the highest audio bit rate is best.
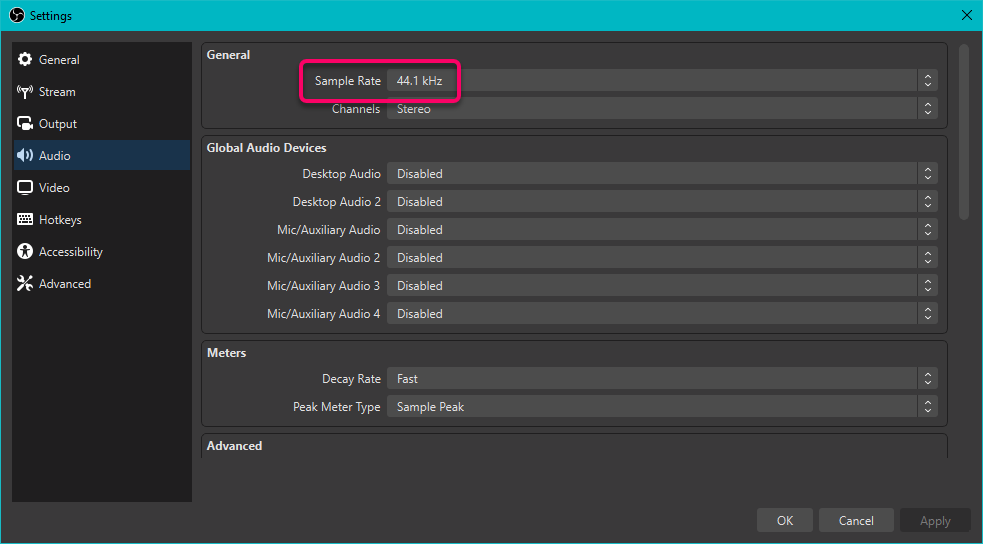
OBS Studio Audio Configuration
This panel can be accessed at File / Settings, then selecting the Audio tab. This is how I configured OBS Studio’s Audio:
OBS Studio Video Configuration
This panel can be accessed at File / Settings, then selecting the Video tab. This is how I configured OBS Studio’s Video:
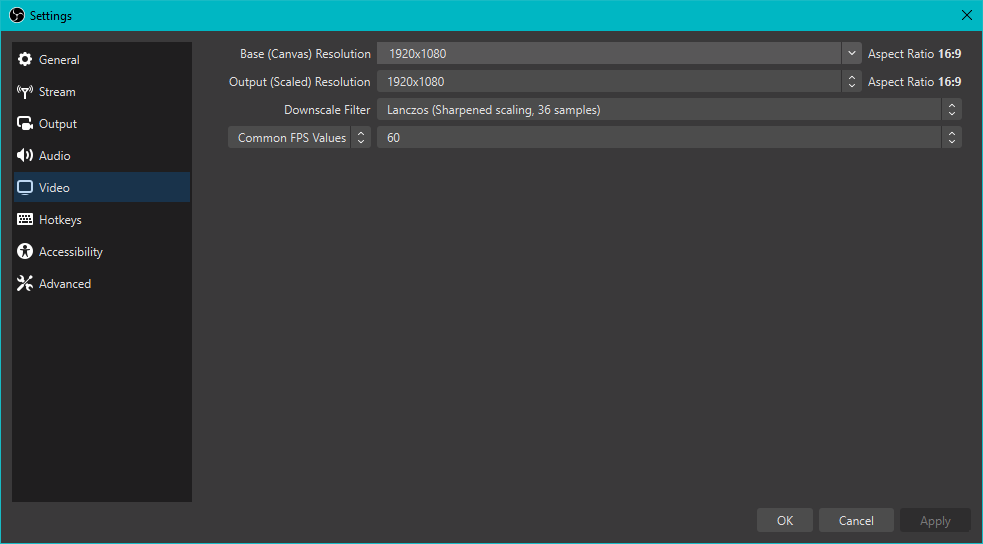
The downscale filter is not used because the Base (Canvas) Resolution setting is the same as the Output (Scaled) Resolution.
Because I have a fast desktop computer and fiber-optic internet service, I decided to try 60 frames per second (fps). This is probably excessive for most of my recording scenarios; however, it would be a good setting for close-up scenes featuring fast finger movement.
OBS Configuration Files
OBS Studio stores the stream encoder settings and a Facebook Stream Key for each profile.
The default profile is called Untitled.
The stream encoder settings for the Untitled profile are stored in
%AppData%\.
Here are the contents, formatted:
{
  "bitrate": 4000,
  "gpu": 1,
  "keyint_sec": 2,
  "lookahead": false,
  "multipass": "fullres",
  "preset2": "p6"
}
The Facebook Stream Key for the Untitled profile is stored in
%AppData%\.
Here are the contents, formatted:
{
  "settings": {
     "bwtest": false,
     "key": "FB-144788691228980-0-asdf-asdfasdf",
     "server": "rtmps://rtmp-api.facebook.com:443/rtmp/",
     "service": "Facebook Live"
  },
  "type": "rtmp_common"
}
Import OBS Studio Sources Into Scene
This means bringing all your audio and video feeds into an OBS Studio scene. The OBS Studio documentation discusses sources. I use DAW software like Pro Tools and Ableton Live for live signal processing.
I previously wrote about obtaining a video feed for OBS Studio using a 4K mirrorless camera, a Cam Link 4K, an HDMI splitter, and an external TV monitor.
I usually spend most of my time playing through my musical works in progress. Because the work is being created through a DAW, streaming the DAW output into OBS Studio is necessary ... or no sound would be heard from the musicians. I also use an MP3 player for backing tracks.
To send the DAW output, or the MP3 player output, to OBS Studio, you either need to use a virtual audio cable or audio loopback.
I previously wrote about Sending DAW Output to OBS Studio Using Loopback.
Setup Facebook Page Streaming
If you create a Facebook page
that is dedicated to a topic, all kinds of good things happen.
My page is facebook.com/mslinnmusic.
This is how to know what the URL is for managing your live videos on your Facebook page:
Whatever the URL of your special page is, simply append live_videos/ to it,
and that will be where you can go to manage your live videos on Facebook.
My live streams can be found at
facebook.com/mslinnmusic/live_videos/.
Setup Facebook Video for Streaming
Click on the Facebook 📹︎ Live video button.
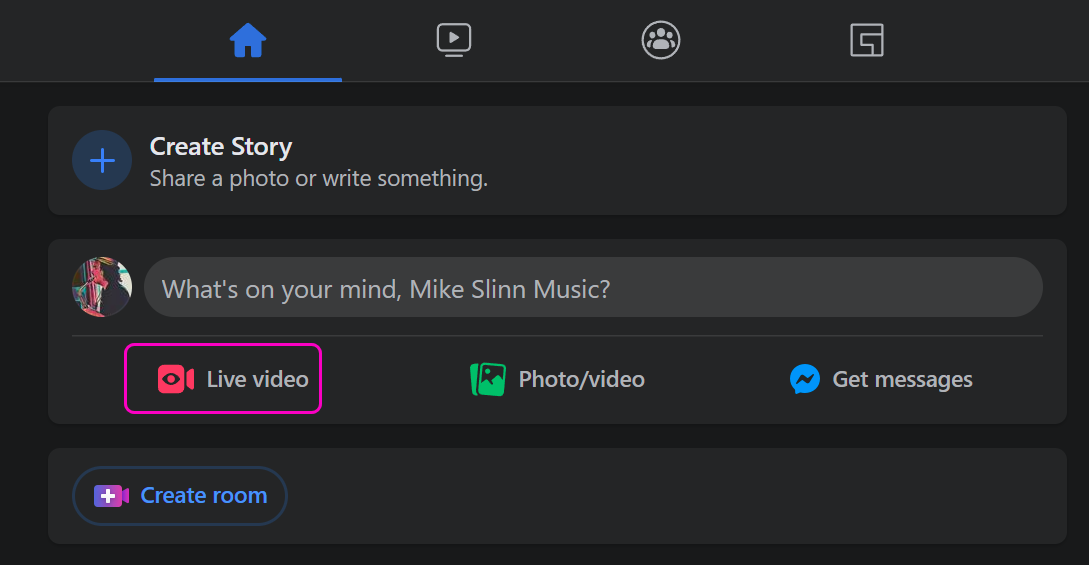
Wait for a few seconds while the Facebook Live Producer page loads any settings that you may have previously set.
The Facebook Live Producer page has changed significantly since I originally wrote this article 51 months ago. I last updated this page on 2023-03-27 to match the current reality.
You can go directly to Facebook Live Producer at any time instead of pressing the 📹︎ Live video button shown above. Bookmark the link!
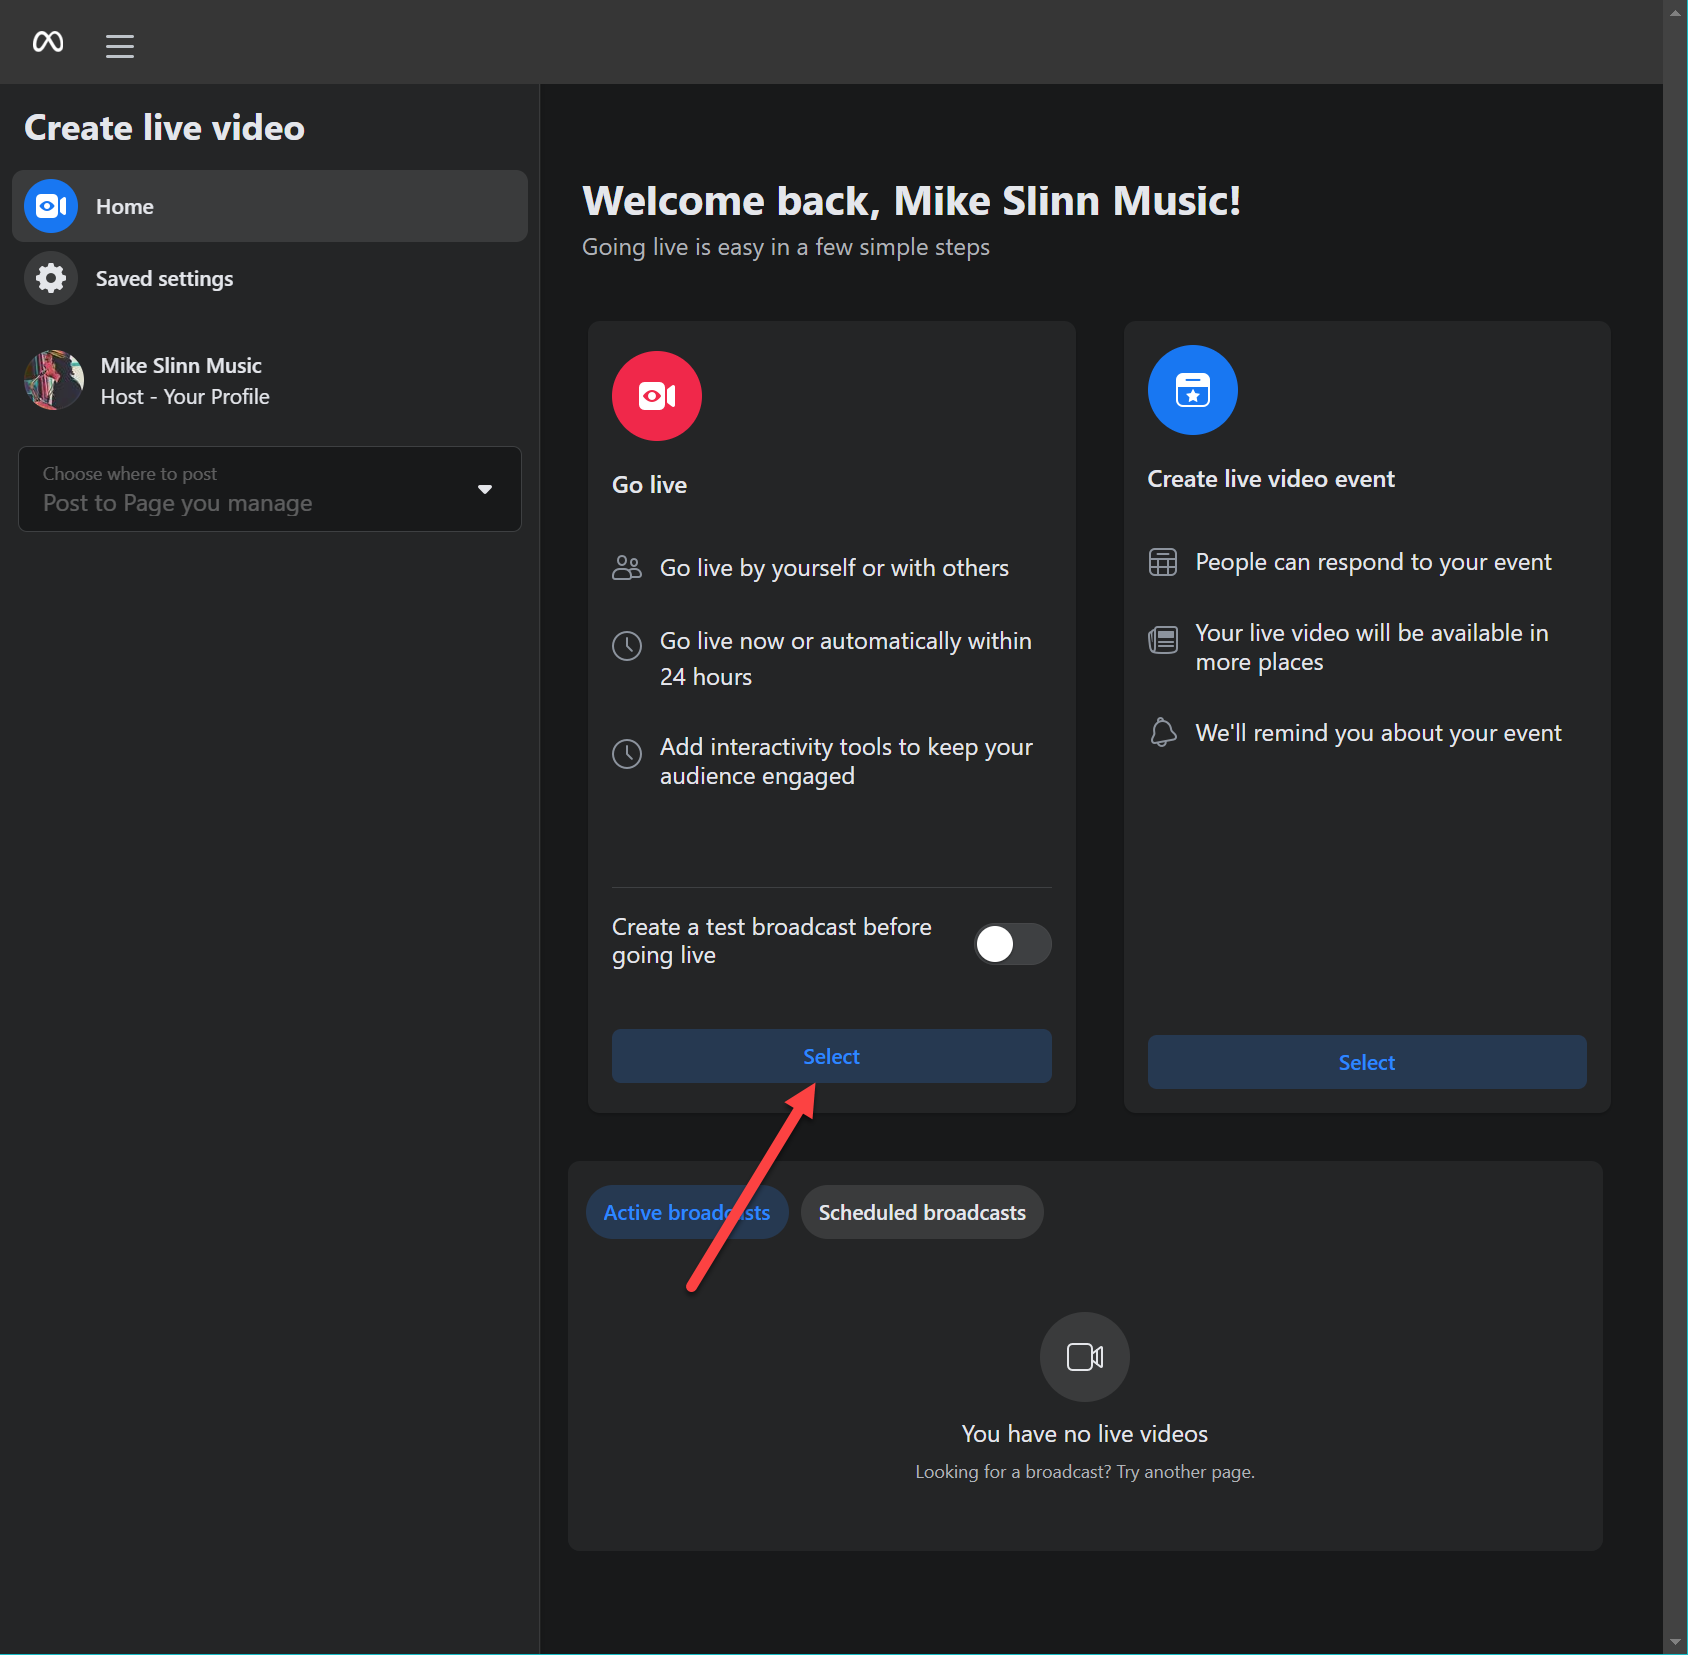
Click on the Go live Select button as shown above. The red arrow points to the button you need to press.
Steps We Will Follow
Now a huge page appears. I have numbered the steps we must follow. We will look at each step individually.
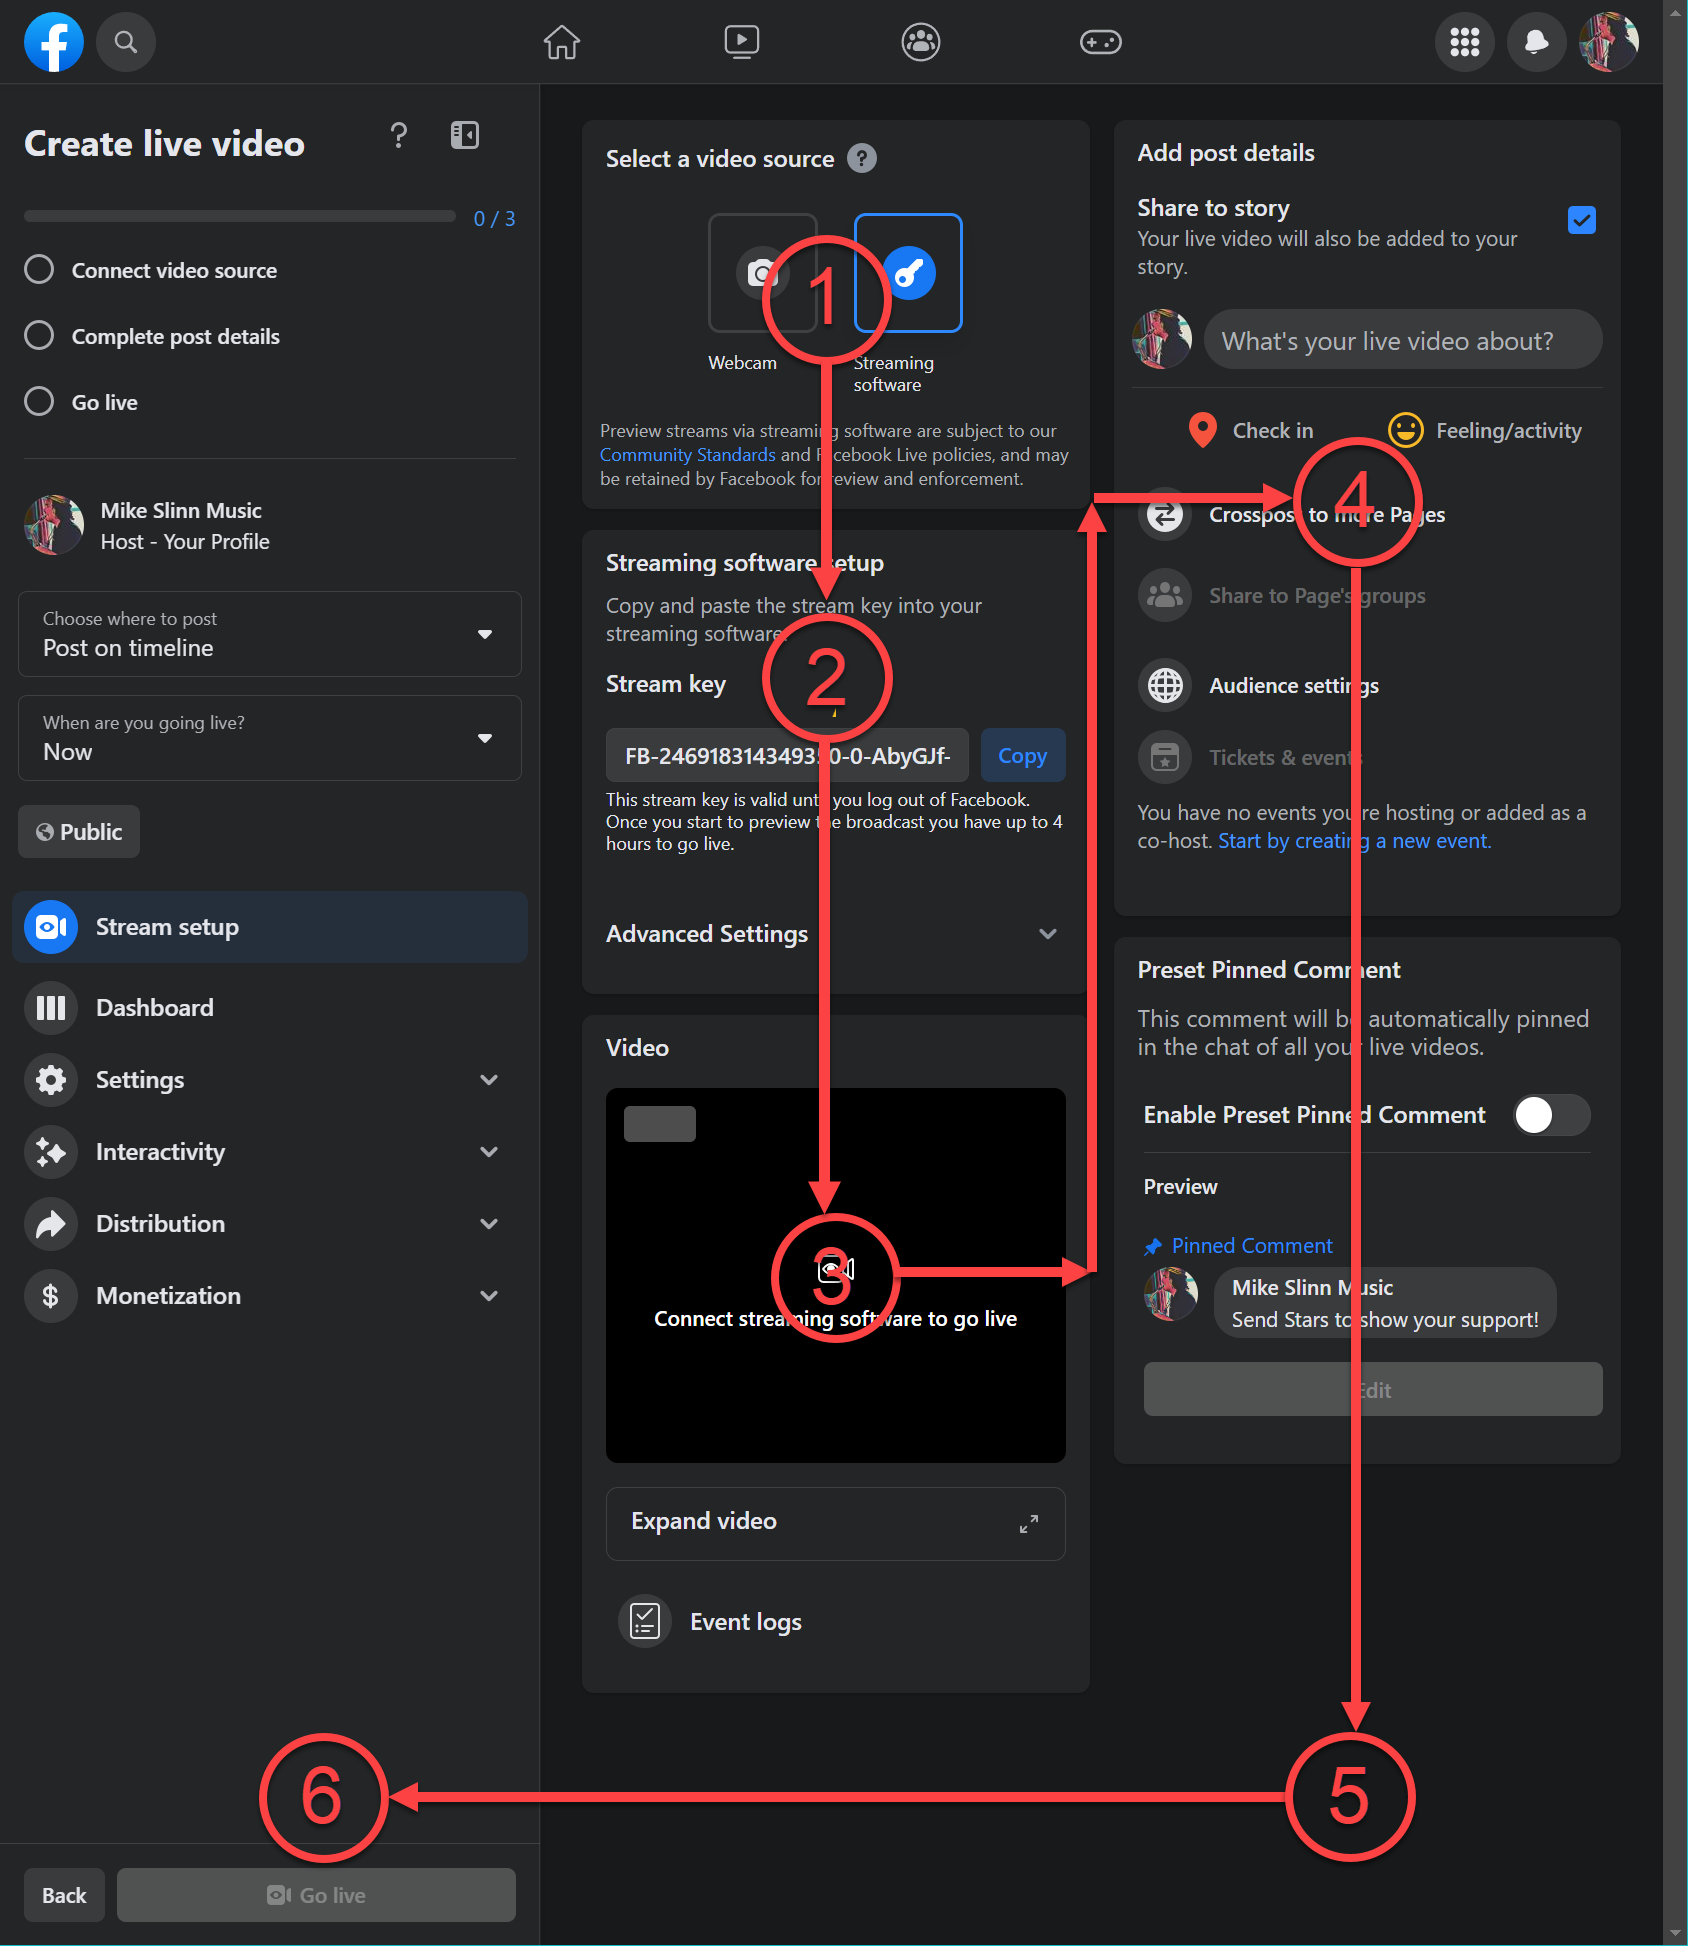
1 Select a video source
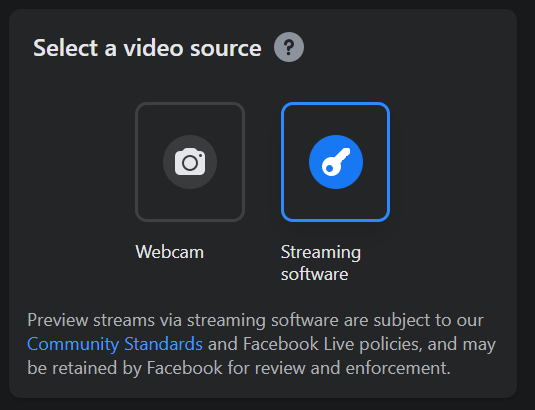
This article is all about streaming using OBS Studio, so the default selection above, Streaming software, is what we want.
2 Stream Key
In Facebook Live, open up Advanced settings in the Streaming software setup section and enable Persistent stream key. I pixelated the Stream Key for security.
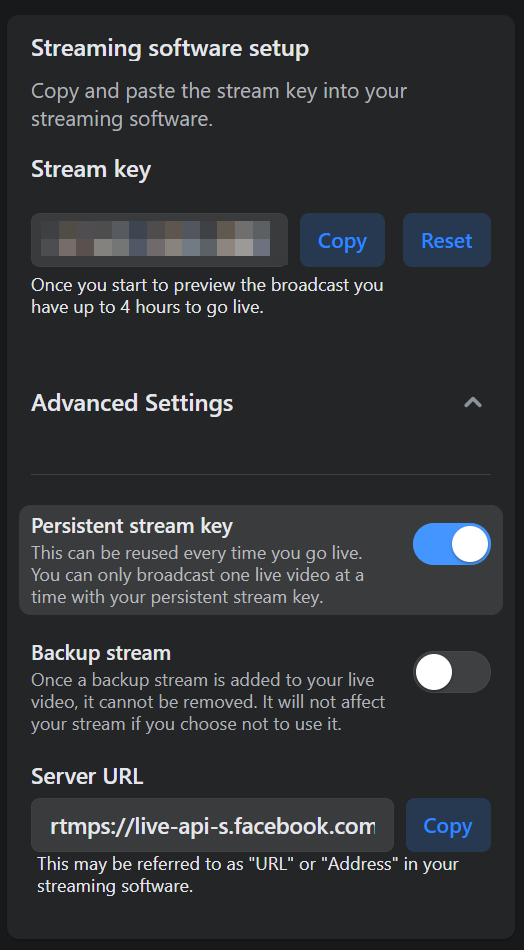
Press the Copy button as shown in the above image to copy the Stream key to the clipboard. Provide this value to OBS Studio by going to File / Settings / Stream, then select Service Facebook Live, and paste the Facebook persistent stream key into Stream Key as shown below.

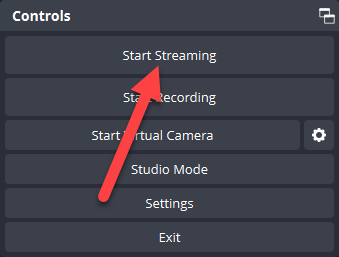
Press OK in OBS Studio. Now click on the OBS Studio Start Streaming button.
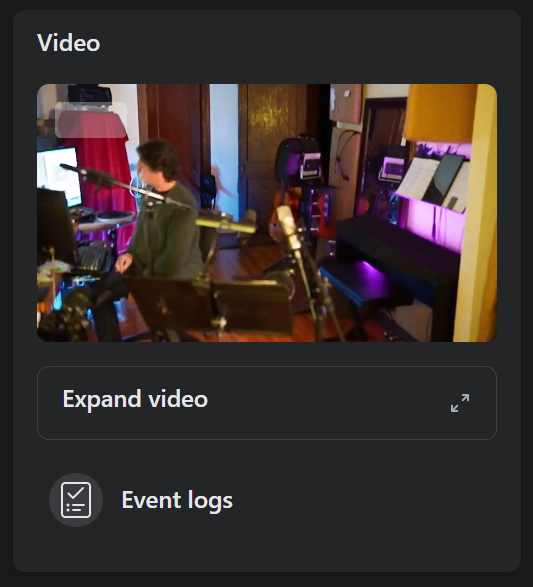
3 Facebook Video for Streaming Setup
After a few seconds, you should notice that the Facebook Video panel shows the OBS Studio scene content.
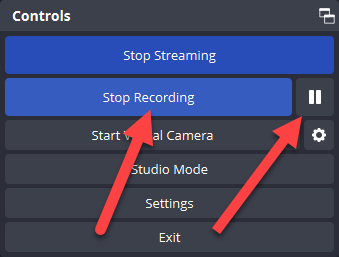
If you configured OBS Studio to start recording when streaming starts, you might want to turn off OBS Studio recording while we get things working so you do not fill up your hard drive with useless video. To do that, just click on Stop Recording in OBS Studio or click on the pause recording button ⏸︎ next to it.
The Facebook streaming key is specific to the computer that is streaming. If you use more than one computer to stream from a given Facebook account, you will need to get a fresh stream key each time you stream from a different computer.
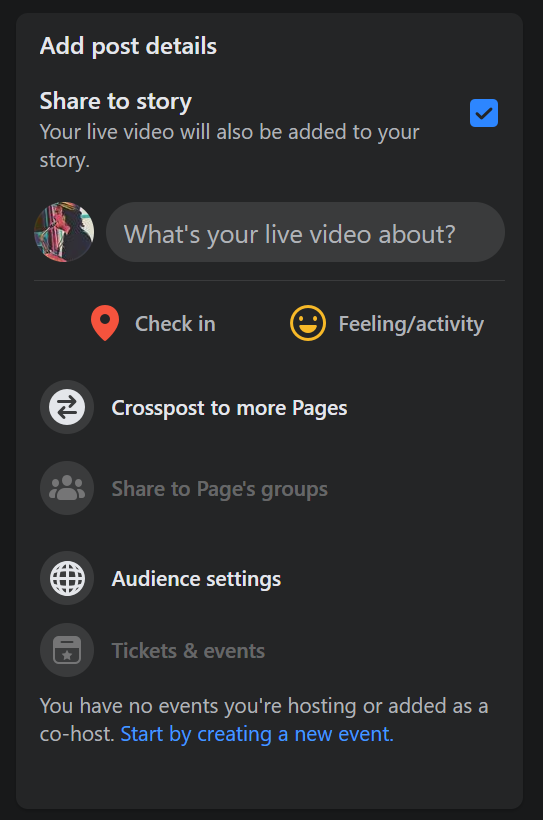
4 Add post details
This next part caused me to get stuck for quite a while. It is actually straightforward; my problem was that I did not expect that software would work this way. Click on What’s your live video about? in the image below.
5 Create Post
When you click on What’s your live video about? as shown above, another dialog box entitled Create Post pops up. You might have noticed that in the Steps We Will Follow image at the top of this section, step 5 is located in the bottom right corner, not really labeling anything. That is because this dialog box just appears unexpectedly.
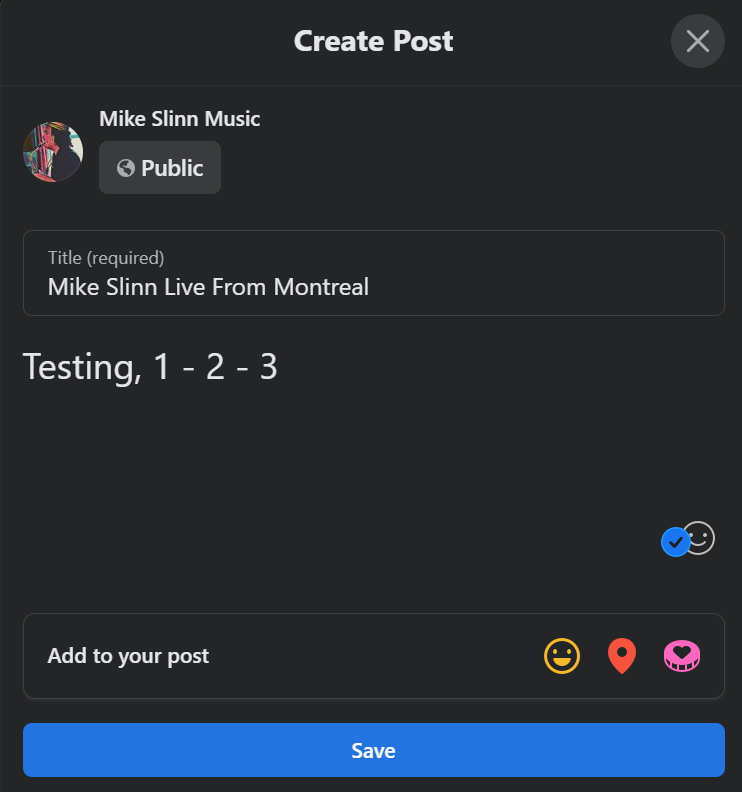
Both sections must be filled out: the Title and the Description. Previous versions of Facebook's software did not require the Description to be filled out.
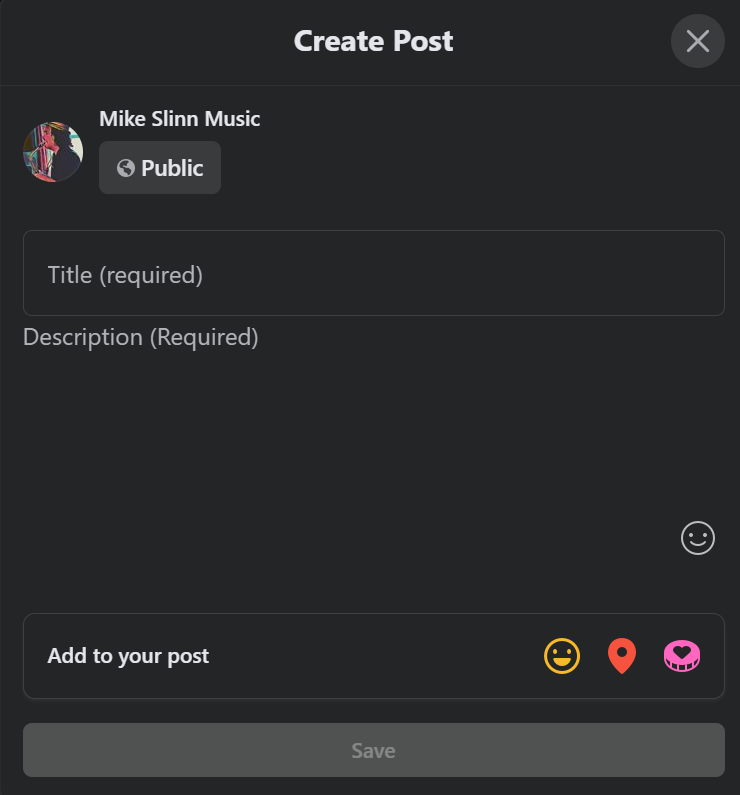
When you fill out this dialog box, it is quite apparent that providing a title is mandatory. The description also needs to be provided.
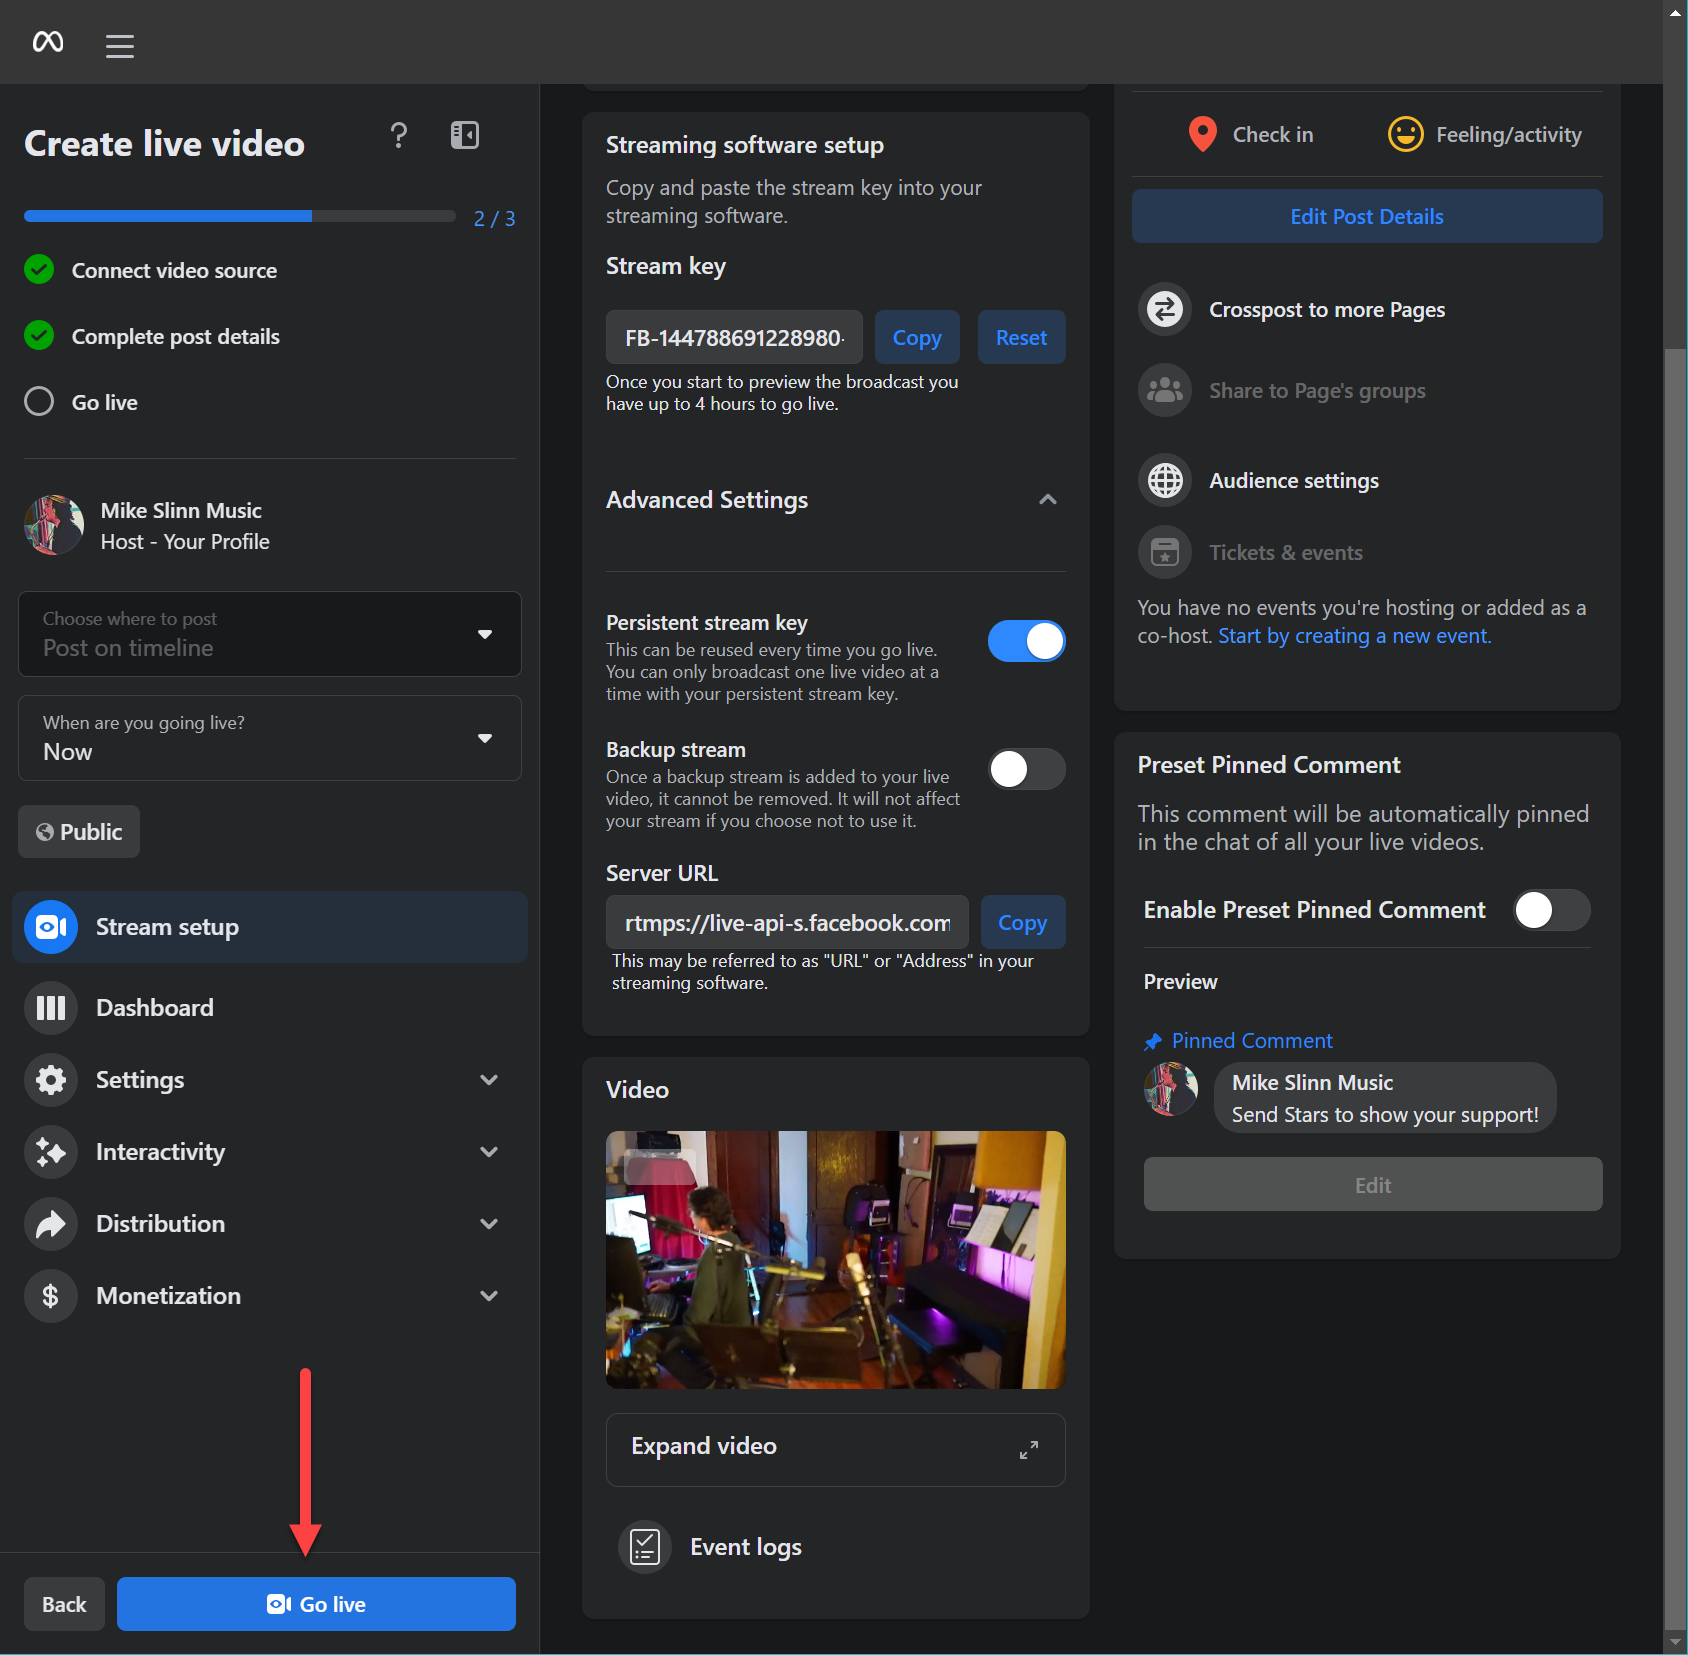
6 Go live
I found that the next step was also not intuitive. In the following image, the red arrow at the bottom left points to the Go live button. That button does what you might expect. Press it – and you will be streaming live on Facebook!
7 Chatting with the audience
Chats from the audience will appear in Facebook Messenger or the Meta Business Suite.


