Published 2022-01-14.
Time to read: 3 minutes.
Recently, I wanted to use some old hard drives as backup media. That meant scrubbing all the partitions off the drives, and installing new partitions, which of course would be empty.
Warning – Working with a command line program for system-level operations, without having backed up the system, is like walking on a tightrope without a net.
A mistake could inadvertently wipe out a different hard drive on the computer than you intended. Without the ability to restore the system disk from backup, your computer could become inoperable.
However, I was unable to repartition one of those old drives using the GUI-based Windows diskmgmt.msc disk manager.
The drive had soft errors.
For some reason, those errors made it impossible for diskmgmt.msc to scan the drive.
The more powerful Windows
diskpart,
a command line program, was able to get the job done.
This article ends by demonstrating how you can get benefit from the diskmgmt
GUI even when you are using the diskpart command line interface.
This is possible because every command you type into diskpart causes a Windows system event
to be published, and because diskmgmt subscribes to those events, it is able to display the results as they happen.
Starting Diskpart
Run diskpart as administrator as follows:
- Press the Windows key. Do not hold it down, just depress it once, as you would do for any other key, and let it go.
- Type
diskpart. - Use the mouse or arrow keys to select Run as administrator.
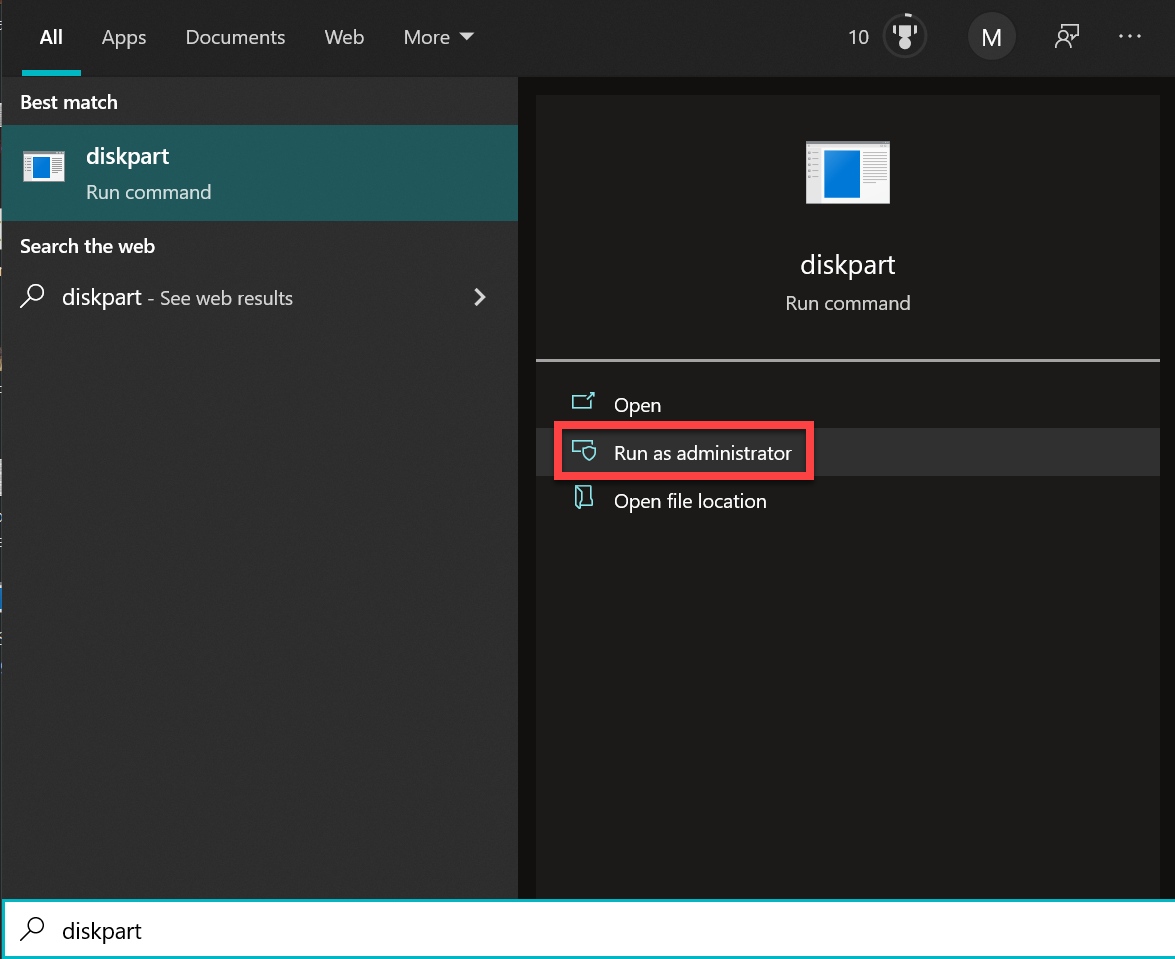
A window should open up labeled Microsoft DiskPart.
Let's start by listing all the diskpart commands.
Microsoft DiskPart version 10.0.19041.964

Copyright (C) Microsoft Corporation.
On computer: BEAR

DISKPART> help

Microsoft DiskPart version 10.0.19041.964

ACTIVE      - Mark the selected partition as active.
ADD         - Add a mirror to a simple volume.
ASSIGN      - Assign a drive letter or mount point to the selected volume.
ATTRIBUTES  - Manipulate volume or disk attributes.
ATTACH      - Attaches a virtual disk file.
AUTOMOUNT   - Enable and disable automatic mounting of basic volumes.
BREAK       - Break a mirror set.
CLEAN       - Clear the configuration information, or all information, off the
              disk.
COMPACT     - Attempts to reduce the physical size of the file.
CONVERT     - Convert between different disk formats.
CREATE      - Create a volume, partition or virtual disk.
DELETE      - Delete an object.
DETAIL      - Provide details about an object.
DETACH      - Detaches a virtual disk file.
EXIT        - Exit DiskPart.
EXTEND      - Extend a volume.
EXPAND      - Expands the maximum size available on a virtual disk.
FILESYSTEMS - Display current and supported file systems on the volume.
FORMAT      - Format the volume or partition.
GPT         - Assign attributes to the selected GPT partition.
HELP        - Display a list of commands.
IMPORT      - Import a disk group.
INACTIVE    - Mark the selected partition as inactive.
LIST        - Display a list of objects.
MERGE       - Merges a child disk with its parents.
ONLINE      - Online an object that is currently marked as offline.
OFFLINE     - Offline an object that is currently marked as online.
RECOVER     - Refreshes the state of all disks in the selected pack.
              Attempts recovery on disks in the invalid pack, and
              resynchronizes mirrored volumes and RAID5 volumes
              that have stale plex or parity data.
REM         - Does nothing. This is used to comment scripts.
REMOVE      - Remove a drive letter or mount point assignment.
REPAIR      - Repair a RAID-5 volume with a failed member.
RESCAN      - Rescan the computer looking for disks and volumes.
RETAIN      - Place a retained partition under a simple volume.
SAN         - Display or set the SAN policy for the currently booted OS.
SELECT      - Shift the focus to an object.
SETID       - Change the partition type.
SHRINK      - Reduce the size of the selected volume.
UNIQUEID    - Displays or sets the GUID partition table (GPT) identifier or
              master boot record (MBR) signature of a disk.
Listing Drives, Partitions and Volumes
Listing the drives is generally a good first step. Let's discover the command for that:
DISKPART> list

Microsoft DiskPart version 10.0.19041.964

DISK        - Display a list of disks. For example, LIST DISK.
PARTITION   - Display a list of partitions on the selected disk.
              For example, LIST PARTITION.
VOLUME      - Display a list of volumes. For example, LIST VOLUME.
VDISK       - Displays a list of virtual disks.
OK, we can list disks, partitions, volumes and virtual disks. Let's list the disk drives.
DISKPART> list disk

Disk ###  Status         Size     Free     Dyn  Gpt
  --------  -------------  -------  -------  ---  ---
  Disk 0    Online         1863 GB  1024 KB        *
  Disk 1    Online          465 GB  1024 KB
  Disk 2    Online         1863 GB  1024 KB        *
  Disk 3    Online         1863 GB      0 B
* Disk 5    Online          931 GB   931 GB        *

At this point, I inserted the old 5.25" SATA drive that I wanted to repurpose into a NewerTech Voyager S3 caddy, connected to my computer via a USB 3 cable, and Windows automatically mounted it. The caddy also accepts 2.5" SATA drives, such as those commonly found in laptops.
Now I told diskpart to rescan the drives, and then I listed the volumes on all disks.
DISKPART> rescan

Please wait while DiskPart scans your configuration...

DiskPart has finished scanning your configuration.

DISKPART> list volume

Volume ###  Ltr  Label        Fs     Type        Size     Status     Info
  ----------  ---  -----------  -----  ----------  -------  ---------  --------
  Volume 0     D                       DVD-ROM         0 B  No Media
  Volume 1     C   BEAR_C       NTFS   Partition   1861 GB  Healthy    Boot
  Volume 2                      FAT32  Partition    100 MB  Healthy    System
  Volume 3                      NTFS   Partition    539 MB  Healthy    Hidden
  Volume 4                      NTFS   Partition    450 MB  Healthy    Hidden
  Volume 5     F   Work         NTFS   Partition   1863 GB  Healthy
  Volume 6     E   BEAR_E       NTFS   Partition   1863 GB  Healthy
  Volume 8                      FAT32  Partition    512 MB  Healthy    Hidden
Diskpart displayed the hidden volume (#8) in the drive in the caddy.
This drive has readonly status set,
which prevents its contents from being modified or deleted.
That would be good if I wanted to use this drive as an archive,
but instead I want to scrub it and write new information on it.
The currently existing partitions on this drive cannot be erased until readonly is cleared.
Lets remove readonly status from the drive now:
DISKPART> select volume 8
Volume 8 is the selected volume.

DISKPART> attributes disk clear readonly
Disk attributes cleared successfully.

DISKPART> rescan
Please wait while DiskPart scans your configuration...
DiskPart has finished scanning your configuration.

DISKPART> list volume
Volume ###  Ltr  Label        Fs     Type        Size     Status     Info
  ----------  ---  -----------  -----  ----------  -------  ---------  --------
  Volume 0     D                       DVD-ROM         0 B  No Media
  Volume 1     C   BEAR_C       NTFS   Partition   1861 GB  Healthy    Boot
  Volume 2                      FAT32  Partition    100 MB  Healthy    System
  Volume 3                      NTFS   Partition    539 MB  Healthy    Hidden
  Volume 4                      NTFS   Partition    450 MB  Healthy    Hidden
  Volume 5     F   Work         NTFS   Partition   1863 GB  Healthy
  Volume 6     E   BEAR_E       NTFS   Partition   1863 GB  Healthy
  Volume 8                      FAT32  Partition    512 MB  Healthy    Hidden
Wiping the Drive
Now it is time to wipe the drive clean, which removes all partitions.
DISKPART> select disk 5
Disk 5 is now the selected disk.

DISKPART> list disk
Disk ###  Status         Size     Free     Dyn  Gpt
  --------  -------------  -------  -------  ---  ---
  Disk 0    Online         1863 GB  1024 KB        *
  Disk 1    Online          465 GB  1024 KB
  Disk 2    Online         1863 GB  1024 KB        *
  Disk 3    Online         1863 GB      0 B
* Disk 5    Online          931 GB   931 GB        *

DISKPART> clean
DiskPart succeeded in cleaning the disk.
Archiving a Drive
If instead of wiping the drive, I wanted to archive the drive, I would want to set the read-only status. To do that, first select the drive as before, then type:
DISKPART> list disk
# Output as shown above

DISKPART> select disk N
Disk N is now the selected disk.

DISKPART> attributes disk set readonly
Now the drive's contents could not accidently be erased or modified.
Create A New Partition
We need to create a new partition that spans the entire disk on the now-empty selected drive.
The create command can do that.
Let's look at the help before using the command:
DISKPART> create
Microsoft DiskPart version 10.0.19041.964

PARTITION   - Create a partition.
VOLUME      - Create a volume.
VDISK       - Creates a virtual disk file.

DISKPART> create partition

Microsoft DiskPart version 10.0.19041.964

EFI         - Create an EFI system partition.
EXTENDED    - Create an extended partition.
LOGICAL     - Create a logical drive.
MSR         - Create a Microsoft Reserved partition.
PRIMARY     - Create a primary partition.
To create a new partition that spans the entire disk on the now-empty selected drive and make it active:
DISKPART> create partition primary
DiskPart succeeded in creating the specified partition.

DISKPART> select partition 1
Partition 1 is now the selected partition.

DISKPART> active
DiskPart marked the current partition as active.
Format A Volume
Let's format the entire selected drive as one volume.
Like the clean command,
the format command operates on the currently selected disk.
First, let's look at the help:
DISKPART> help format
Formats the specified volume for use with Windows.
Syntax: FORMAT [[FS=<FS>] [REVISION=<X.XX>] | RECOMMENDED] [LABEL=<"label">] [UNIT=<N>] [QUICK] [COMPRESS] [OVERRIDE] [DUPLICATE] [NOWAIT] [NOERR]
FS=Specifies the type of file system. If no file system is given, the default file system displayed by the FILESYSTEMS command is used.
REVISION=<X.XX>
Specifies the file system revision (if applicable).
RECOMMENDED If specified, use the recommended file system and revision instead of the default if a recommendation exists. The recommended file system (if one exists) is displayed by the FILESYSTEMS command.
LABEL=<"label">
Specifies the volume label.
UNIT=<N> Overrides the default allocation unit size. Default settings are strongly recommended for general use. The default allocation unit size for a particular file system is displayed by the FILESYSTEMS command.
NTFS compression is not supported for allocation unit sizes above 4096.
QUICK Performs a quick format.
COMPRESS NTFS only: Files created on the new volume will be compressed by default.
OVERRIDE Forces the file system to dismount first if necessary. All opened handles to the volume would no longer be valid.
DUPLICATE UDF Only: This flag applies to UDF format, version 2.5 or higher. This flag instructs the format operation to duplicate the file system meta-data to a second set of sectors on the disk. The duplicate meta-data is used by applications, for example repair or recovery applications. If the primary meta-data sectors are found to be corrupted, the file system meta-data will be read from the duplicate sectors.
NOWAIT Forces the command to return immediately while the format process is still in progress. If NOWAIT is not specified, DiskPart will display format progress in percentage.
NOERR For scripting only. When an error is encountered, DiskPart continues to process commands as if the error did not occur. Without the NOERR parameter, an error causes DiskPart to exit with an error code.
A volume must be selected for this operation to succeed.
Examples:
FORMAT FS=NTFS LABEL="New Volume" QUICK COMPRESS FORMAT RECOMMENDED OVERRIDE
Diskpart automatically chooses the optimal file system for the selected drive if you do not specify it.
Choices include FAT, FAT32 and NTFS.
To quick format the selected drive using the optimal file system:
DISKPART> format quick
The default is to fully format the selected drive, which is what you want if the selected drive is suspect:
DISKPART> format
You could specify multiple parameters, for example:
DISKPART> format fs=ntfs label="My Drive" quick
Assigning a Drive Letter
Once the drive was formatted,
I assigned the selected drive the letter G.
You do not normally need to perform this step, unless you want to
define a default letter for this drive.
DISKPART> assign letter=G
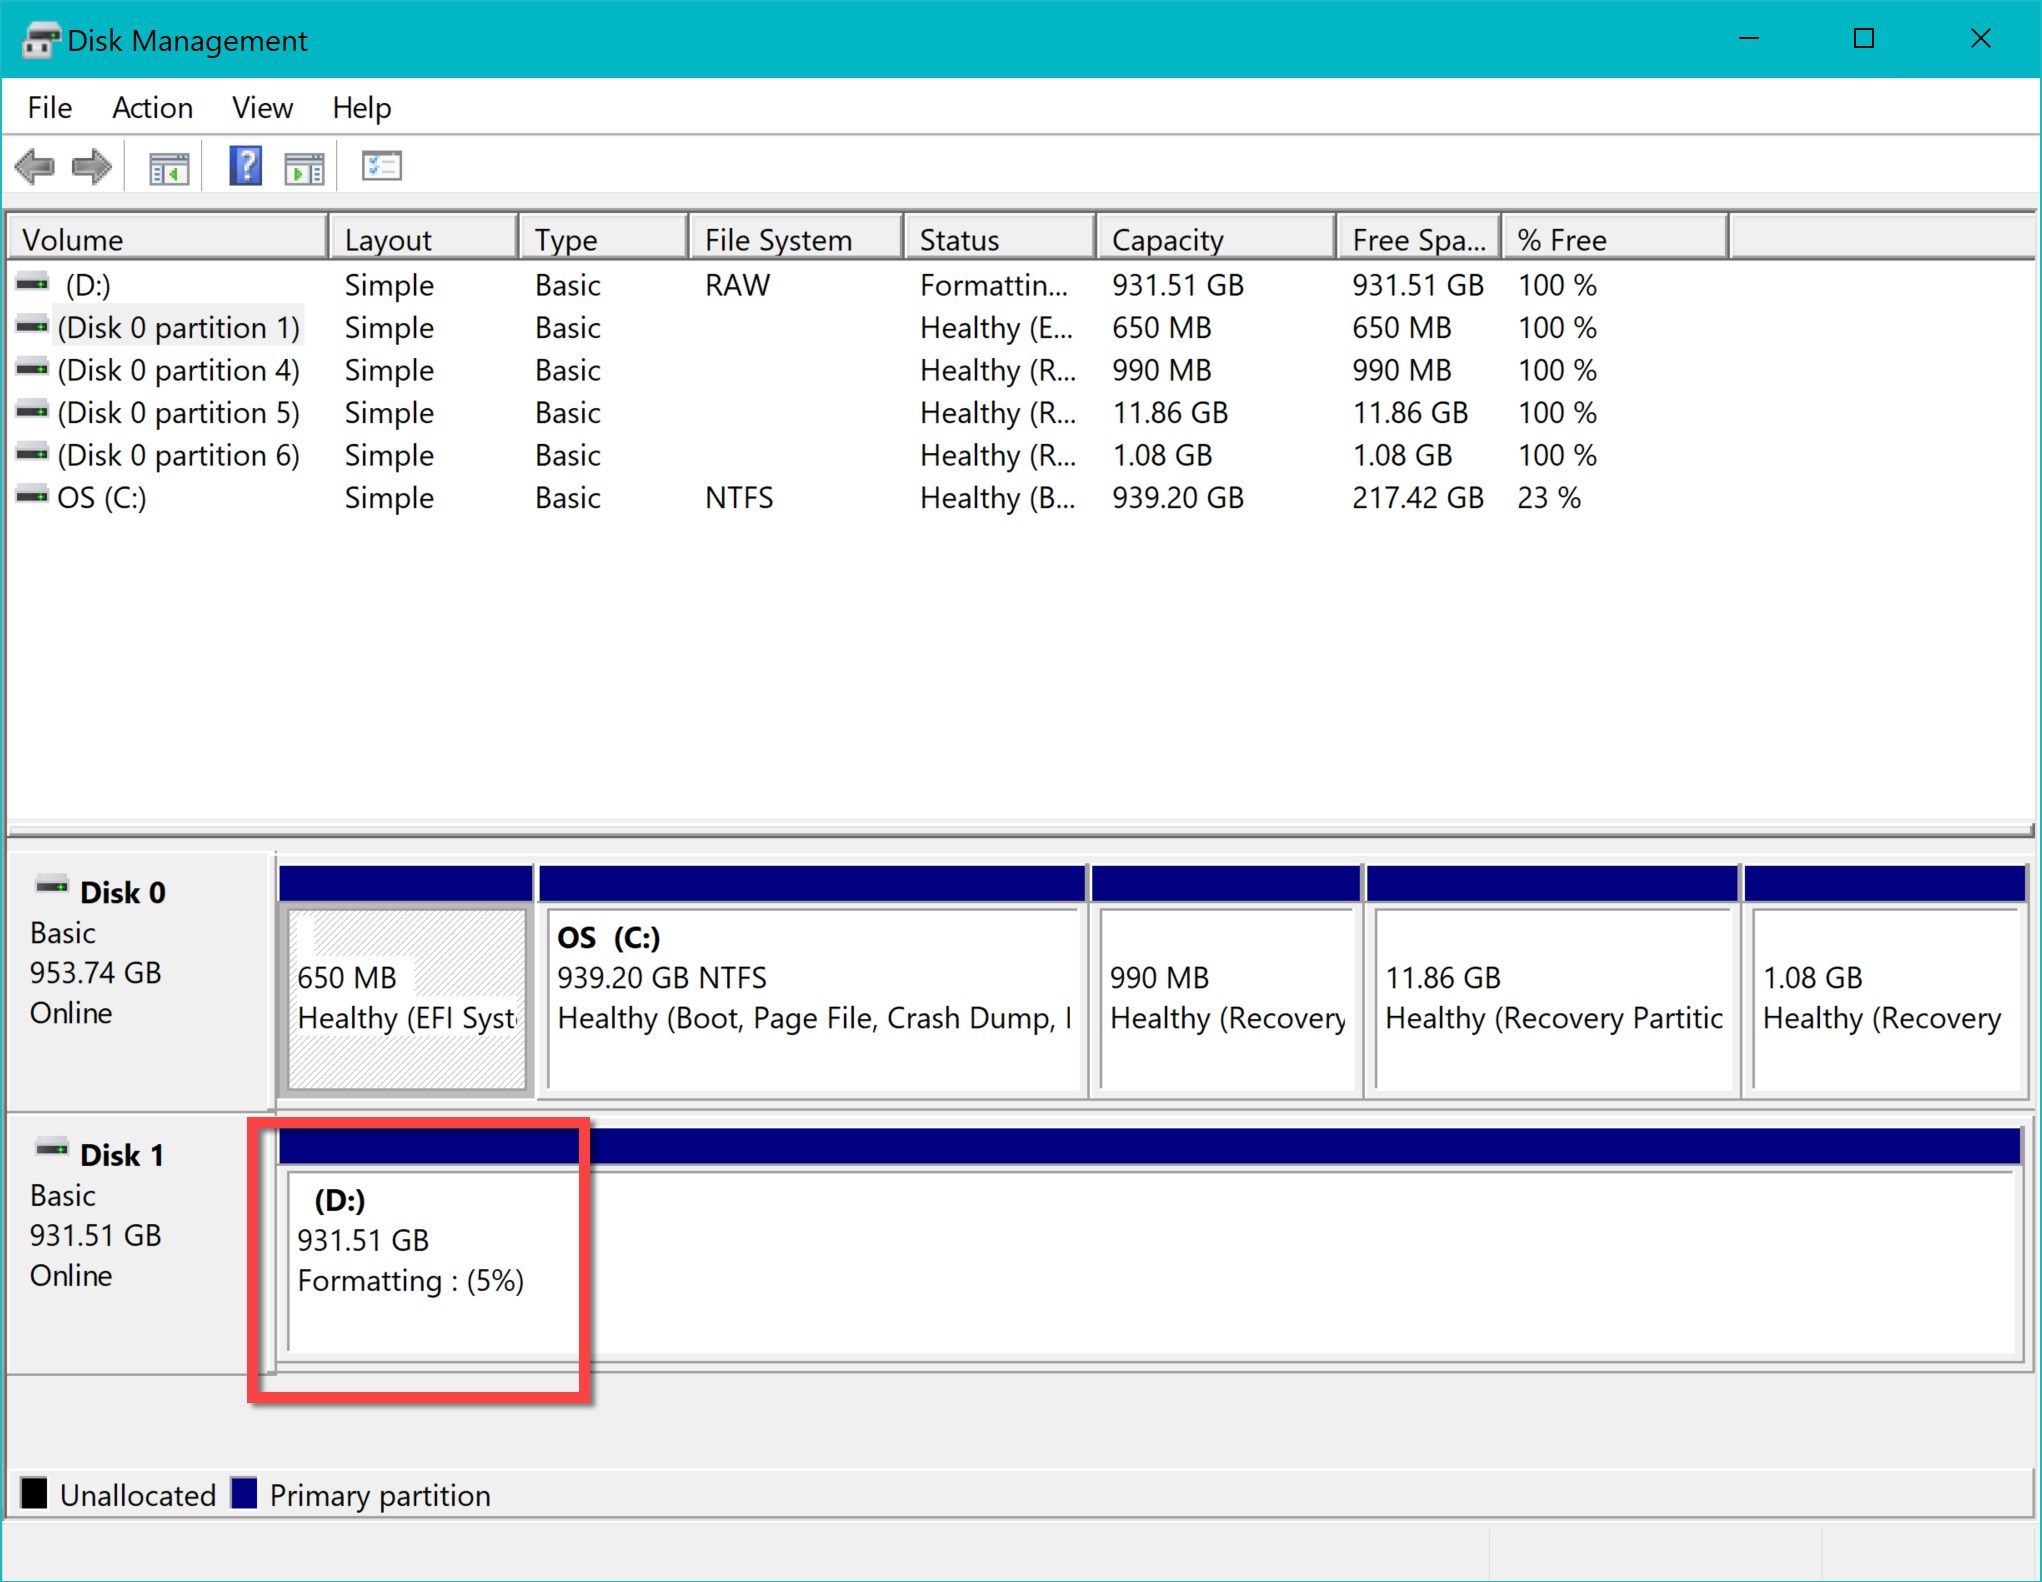
Diskmgmt GUI Shows Progress
Having a GUI continuously report the current state of the drive maintenance you are performing using a command-line interface is a good practice.
The GUI-based Windows disk manager, diskmgmt.msc,
can show the instantaneous progress of all diskpart commands,
working on every drive,
including creating and deleting partitions, volumes, formatting and much more.
For example, formatting progress can be seen here:
Run diskmgmt.msc by:
- Press the Windows key once and let go.
- Type
diskmgmt - Press Enter
Exit
To exit diskpart, either type Exit or press CTRL-C.
DISKPART> exit
The drive is ready for its next assignment!


