I wanted to be able to walk readers through the Jekyll installation experience on Ubuntu 22.04/Jammy Jellyfish, but I had already installed it on all the machines that I wanted to. Podman to the rescue! Podman is a better Docker. I have written about Podman, Buildah and skopeo before.
$ podman info --debug
host:
arch: amd64
buildahVersion: 1.23.1
cgroupControllers: []
cgroupManager: cgroupfs
cgroupVersion: v1
conmon:
package: 'conmon: /usr/bin/conmon'
path: /usr/bin/conmon
version: 'conmon version 2.0.25, commit: unknown'
cpus: 12
distribution:
codename: jammy
distribution: ubuntu
version: "22.04"
eventLogger: file
hostname: camille
idMappings:
gidmap:
- container_id: 0
host_id: 1000
size: 1
- container_id: 1
host_id: 100000
size: 65536
uidmap:
- container_id: 0
host_id: 1000
size: 1
- container_id: 1
host_id: 100000
size: 65536
kernel: 5.10.102.1-microsoft-standard-WSL2
linkmode: dynamic
logDriver: k8s-file
memFree: 2914873344
memTotal: 6220324864
ociRuntime:
name: crun
package: 'crun: /usr/bin/crun'
path: /usr/bin/crun
version: |-
crun version 0.17
commit: 0e9229ae34caaebcb86f1fde18de3acaf18c6d9a
spec: 1.0.0
+SYSTEMD +SELINUX +APPARMOR +CAP +SECCOMP +EBPF +YAJL
os: linux
remoteSocket:
path: /tmp/podman-run-1000/podman/podman.sock
security:
apparmorEnabled: false
capabilities: CAP_CHOWN,CAP_DAC_OVERRIDE,CAP_FOWNER,CAP_FSETID,CAP_KILL,CAP_NET_BIND_SERVICE,CAP_SETFCAP,CAP_SETGID,CAP_SETPCAP,CAP_SETUID,CAP_SYS_CHROOT
rootless: true
seccompEnabled: true
seccompProfilePath: /usr/share/containers/seccomp.json
selinuxEnabled: false
serviceIsRemote: false
slirp4netns:
executable: /usr/bin/slirp4netns
package: 'slirp4netns: /usr/bin/slirp4netns'
version: |-
slirp4netns version 1.0.1
commit: 6a7b16babc95b6a3056b33fb45b74a6f62262dd4
libslirp: 4.6.1
swapFree: 0
swapTotal: 0
uptime: 72h 15m 5.89s (Approximately 3.00 days)
plugins:
log:
- k8s-file
- none
- journald
network:
- bridge
- macvlan
volume:
- local
registries:
search:
- quay.io
- docker.io
- registry.access.redhat.com
store:
configFile: /home/mslinn/.config/containers/storage.conf
containerStore:
number: 3
paused: 0
running: 0
stopped: 3
graphDriverName: overlay
graphOptions:
overlay.mount_program:
Executable: /usr/bin/fuse-overlayfs
Package: 'fuse-overlayfs: /usr/bin/fuse-overlayfs'
Version: |-
fusermount3 version: 3.10.5
fuse-overlayfs: version 1.7.1
FUSE library version 3.10.5
using FUSE kernel interface version 7.31
graphRoot: /home/mslinn/.local/share/containers/storage
graphStatus:
Backing Filesystem: extfs
Native Overlay Diff: "false"
Supports d_type: "true"
Using metacopy: "false"
imageStore:
number: 4
runRoot: /tmp/run-1000/containers
volumePath: /home/mslinn/.local/share/containers/storage/volumes
version:
APIVersion: 3.4.4
Built: 0
BuiltTime: Wed Dec 31 19:00:00 1969
GitCommit: ""
GoVersion: go1.17.3
OsArch: linux/amd64
Version: 3.4.4
Using Podman to Create an Ubuntu Instance
Docker images for Ubuntu include ubuntu:jammy-20220421 for Ubuntu. The default Ubuntu image for Docker provides the currently shipping version. At the time this was written, that was Ubuntu 22.04 (Jammy Jellyfish). Here is how to download and install an instance of that image, using Podman:
$ podman pull docker.io/library/ubuntu
Trying to pull docker.io/library/ubuntu:latest...
Getting image source signatures
Copying blob 8527c5f86ecc done
Copying config 3f4714ee06 done
Writing manifest to image destination
Storing signatures
3f4714ee068a59a09d9e77de71ec1254e5916d6e5779140bc96cec7d0edea18d
To download a specific version of Ubuntu:
$ podman image pull ubuntu:22.04
Resolved "ubuntu" as an alias (/etc/containers/registries.conf.d/shortnames.conf)
Trying to pull docker.io/library/ubuntu:22.04...
Getting image source signatures
Copying blob 125a6e411906 done
Copying config d2e4e1f511 done
Writing manifest to image destination
Storing signatures
d2e4e1f511320dfb2d0baff2468fcf0526998b73fe10c8890b4684bb7ef8290f
Now to review the list of images my machine had at that point:
$ podman image list --all
REPOSITORY                     TAG         IMAGE ID      CREATED        SIZE
docker.io/library/ubuntu       22.04       d2e4e1f51132  20 hours ago   80.3 MB
docker.io/library/ubuntu       latest      3f4714ee068a  8 days ago     80.3 MB
public.ecr.aws/lambda/python   latest      e12ea62c5582  12 months ago  622 MB
public.ecr.aws/lambda/python   3.8         e12ea62c5582  12 months ago  622 MB
docker.io/library/hello-world  latest      d1165f221234  14 months ago  20 kB
Following is an example of running a single Bash command on the Ubuntu Jammy Jellyfish image:
$ podman run docker.io/library/ubuntu cat /etc/os-release
PRETTY_NAME="Ubuntu 22.04 LTS"
NAME="Ubuntu"
VERSION_ID="22.04"
VERSION="22.04 (Jammy Jellyfish)"
VERSION_CODENAME=jammy
ID=ubuntu
ID_LIKE=debian
HOME_URL="https://www.ubuntu.com/"
SUPPORT_URL="https://help.ubuntu.com/"
BUG_REPORT_URL="https://bugs.launchpad.net/ubuntu/"
PRIVACY_POLICY_URL="https://www.ubuntu.com/legal/terms-and-policies/privacy-policy"
UBUNTU_CODENAME=jammy
I created a new directory that will exclusively be used for sharing files with the container that will be built from the recently downloaded image.
The directory, jekyll_test, has the same name as the container that will be created:
$ mkdir ~/jekyll_test
The podman run command
has the same functions as docker run.
The options that follow the command depend on the type of container being run.
Here is the help message:
$ podman run --help
Run a command in a new container

Description:
  Runs a command in a new container from the given image

Usage:
  podman run [options] IMAGE [COMMAND [ARG...]]

Examples:
  podman run imageID ls -alF /etc
  podman run --network=host imageID dnf -y install java
  podman run --volume /var/hostdir:/var/ctrdir -i -t fedora /bin/bash

Options:
      --add-host strings Add a custom host-to-IP mapping (host:ip) (default [])
      --annotation strings Add annotations to container (key=value)
      --arch ARCH use ARCH instead of the architecture of the machine for choosing images
  -a, --attach strings Attach to STDIN, STDOUT or STDERR
      --authfile string Path of the authentication file. Use REGISTRY_AUTH_FILE environment variable to override
      --blkio-weight string Block IO weight (relative weight) accepts a weight value between 10 and 1000.
      --blkio-weight-device DEVICE_NAME:WEIGHT Block IO weight (relative device weight, format: DEVICE_NAME:WEIGHT)
      --cap-add strings Add capabilities to the container
      --cap-drop strings Drop capabilities from the container
      --cgroup-conf strings Configure cgroup v2 (key=value)
      --cgroup-parent string Optional parent cgroup for the container
      --cgroupns string cgroup namespace to use
      --cgroups string control container cgroup configuration ("enabled"|"disabled"|"no-conmon"|"split") (default "enabled")
      --chrootdirs strings Chroot directories inside the container
      --cidfile string Write the container ID to the file
      --conmon-pidfile string Path to the file that will receive the PID of conmon
      --cpu-period uint Limit the CPU CFS (Completely Fair Scheduler) period
      --cpu-quota int Limit the CPU CFS (Completely Fair Scheduler) quota
      --cpu-rt-period uint Limit the CPU real-time period in microseconds
      --cpu-rt-runtime int Limit the CPU real-time runtime in microseconds
  -c, --cpu-shares uint CPU shares (relative weight)
      --cpus float Number of CPUs. The default is 0.000 which means no limit
      --cpuset-cpus string CPUs in which to allow execution (0-3, 0,1)
      --cpuset-mems string Memory nodes (MEMs) in which to allow execution (0-3, 0,1). Only effective on NUMA systems.
      --decryption-key strings Key needed to decrypt the image (e.g. /path/to/key.pem)
  -d, --detach Run container in background and print container ID
      --detach-keys [a-Z] Override the key sequence for detaching a container. Format is a single character [a-Z] or a comma separated sequence of `ctrl-<value>`, where `<value>` is one of: `a-cf`, `@`, `^`, `[`, `\`, `]`, `^` or `_` (default "ctrl-p,ctrl-q")
      --device strings Add a host device to the container
      --device-cgroup-rule strings Add a rule to the cgroup allowed devices list
      --device-read-bps strings Limit read rate (bytes per second) from a device (e.g. --device-read-bps=/dev/sda:1mb)
      --device-read-iops strings Limit read rate (IO per second) from a device (e.g. --device-read-iops=/dev/sda:1000)
      --device-write-bps strings Limit write rate (bytes per second) to a device (e.g. --device-write-bps=/dev/sda:1mb)
      --device-write-iops strings Limit write rate (IO per second) to a device (e.g. --device-write-iops=/dev/sda:1000)
      --disable-content-trust This is a Docker specific option and is a NOOP
      --dns strings Set custom DNS servers
      --dns-option strings Set custom DNS options
      --dns-search strings Set custom DNS search domains
      --entrypoint string Overwrite the default ENTRYPOINT of the image
  -e, --env stringArray Set environment variables in container (default [PATH=/usr/local/sbin:/usr/local/bin:/usr/sbin:/usr/bin:/sbin:/bin])
      --env-file strings Read in a file of environment variables
      --env-host Use all current host environment variables in container
      --env-merge stringArray Preprocess environment variables from image before injecting them into the container
      --expose strings Expose a port or a range of ports
      --gidmap strings GID map to use for the user namespace
      --group-add strings Add additional groups to the primary container process. 'keep-groups' allows container processes to use supplementary groups.
      --group-entry string Entry to write to /etc/group
      --health-cmd string set a healthcheck command for the container ('none' disables the existing healthcheck)
      --health-interval string set an interval for the healthcheck (a value of disable results in no automatic timer setup) (default "30s")
      --health-on-failure string action to take once the container turns unhealthy (default "none")
      --health-retries uint the number of retries allowed before a healthcheck is considered to be unhealthy (default 3)
      --health-start-period string the initialization time needed for a container to bootstrap (default "0s")
      --health-startup-cmd string Set a startup healthcheck command for the container
      --health-startup-interval string Set an interval for the startup healthcheck (default "30s")
      --health-startup-retries uint Set the maximum number of retries before the startup healthcheck will restart the container
      --health-startup-success uint Set the number of consecutive successes before the startup healthcheck is marked as successful and the normal healthcheck begins (0 indicates any success will start the regular healthcheck)
      --health-startup-timeout string Set the maximum amount of time that the startup healthcheck may take before it is considered failed (default "30s")
      --health-timeout string the maximum time allowed to complete the healthcheck before an interval is considered failed (default "30s")
      --help
  -h, --hostname string Set container hostname
      --hostuser strings Host user account to add to /etc/passwd within container
      --http-proxy Set proxy environment variables in the container based on the host proxy vars (default true)
      --image-volume string Tells podman how to handle the builtin image volumes ("bind"|"tmpfs"|"ignore") (default "bind")
      --init Run an init binary inside the container that forwards signals and reaps processes
      --init-path string Path to the container-init binary
  -i, --interactive Keep STDIN open even if not attached
      --ip string Specify a static IPv4 address for the container
      --ip6 string Specify a static IPv6 address for the container
      --ipc string IPC namespace to use
  -l, --label stringArray Set metadata on container
      --label-file strings Read in a line delimited file of labels
      --log-driver string Logging driver for the container (default "journald")
      --log-opt strings Logging driver options
      --mac-address string Container MAC address (e.g. 92:d0:c6:0a:29:33)
  -m, --memory <number>[<unit>] Memory limit (format: <number>[<unit>], where unit = b (bytes), k (kibibytes), m (mebibytes), or g (gibibytes))
      --memory-reservation <number>[<unit>] Memory soft limit (format: <number>[<unit>], where unit = b (bytes), k (kibibytes), m (mebibytes), or g (gibibytes))
      --memory-swap string Swap limit equal to memory plus swap: '-1' to enable unlimited swap
      --memory-swappiness int Tune container memory swappiness (0 to 100, or -1 for system default) (default -1)
      --mount stringArray Attach a filesystem mount to the container
      --name string Assign a name to the container
      --network stringArray Connect a container to a network
      --network-alias strings Add network-scoped alias for the container
      --no-healthcheck Disable healthchecks on container
      --no-hosts Do not create /etc/hosts within the container, instead use the version from the image
      --oom-kill-disable Disable OOM Killer
      --oom-score-adj int Tune the host's OOM preferences (-1000 to 1000)
      --os OS use OS instead of the running OS for choosing images
      --passwd add entries to /etc/passwd and /etc/group (default true)
      --passwd-entry string Entry to write to /etc/passwd
      --personality string Configure execution domain using personality (e.g., LINUX/LINUX32)
      --pid string PID namespace to use
      --pidfile string Write the container process ID to the file
      --pids-limit int Tune container pids limit (set -1 for unlimited)
      --platform string Specify the platform for selecting the image. (Conflicts with --arch and --os)
      --pod string Run container in an existing pod
      --pod-id-file string Read the pod ID from the file
      --preserve-fds uint Pass a number of additional file descriptors into the container
      --privileged Give extended privileges to container
  -p, --publish strings Publish a container's port, or a range of ports, to the host (default [])
  -P, --publish-all Publish all exposed ports to random ports on the host interface
      --pull string Pull image policy ("always"|"missing"|"never"|"newer") (default "missing")
  -q, --quiet Suppress output information when pulling images
      --rdt-class string Class of Service (COS) that the container should be assigned to
      --read-only Make containers root filesystem read-only
      --read-only-tmpfs When running --read-only containers mount read-write tmpfs on /dev, /dev/shm, /run, /tmp and /var/tmp (default true)
      --replace If a container with the same name exists, replace it
      --requires strings Add one or more requirement containers that must be started before this container will start
      --restart string Restart policy to apply when a container exits ("always"|"no"|"never"|"on-failure"|"unless-stopped")
      --rm Remove container and any anonymous unnamed volume associated with the container after exit
      --rmi Remove image unless used by other containers, implies --rm
      --rootfs The first argument is not an image but the rootfs to the exploded container
      --sdnotify string control sd-notify behavior ("container"|"conmon"|"ignore") (default "container")
      --seccomp-policy string Policy for selecting a seccomp profile (experimental) (default "default")
      --secret stringArray Add secret to container
      --security-opt stringArray Security Options
      --shm-size <number>[<unit>] Size of /dev/shm (format: <number>[<unit>], where unit = b (bytes), k (kibibytes), m (mebibytes), or g (gibibytes)) (default "65536k")
      --shm-size-systemd <number>[<unit>] Size of systemd specific tmpfs mounts (/run, /run/lock) (format: <number>[<unit>], where unit = b (bytes), k (kibibytes), m (mebibytes), or g (gibibytes))
      --sig-proxy Proxy received signals to the process (default true)
      --stop-signal string Signal to stop a container. Default is SIGTERM
      --stop-timeout uint Timeout (in seconds) that containers stopped by user command have to exit. If exceeded, the container will be forcibly stopped via SIGKILL. (default 10)
      --subgidname string Name of range listed in /etc/subgid for use in user namespace
      --subuidname string Name of range listed in /etc/subuid for use in user namespace
      --sysctl strings Sysctl options
      --systemd string Run container in systemd mode ("true"|"false"|"always") (default "true")
      --timeout uint Maximum length of time a container is allowed to run. The container will be killed automatically after the time expires.
      --tls-verify Require HTTPS and verify certificates when contacting registries for pulling images
      --tmpfs tmpfs Mount a temporary filesystem (tmpfs) into a container
  -t, --tty Allocate a pseudo-TTY for container
      --tz string Set timezone in container
      --uidmap strings UID map to use for the user namespace
      --ulimit strings Ulimit options
      --umask string Set umask in container (default "0022")
      --unsetenv stringArray Unset environment default variables in container
      --unsetenv-all Unset all default environment variables in container
  -u, --user string Username or UID (format: <name|uid>[:<group|gid>])
      --userns string User namespace to use
      --uts string UTS namespace to use
      --variant VARIANT Use VARIANT instead of the running architecture variant for choosing images
  -v, --volume stringArray Bind mount a volume into the container
      --volumes-from stringArray Mount volumes from the specified container(s)
  -w, --workdir string Working directory inside the container
I found this information to be helpful.
Creating a Podman Container
This is how I created a new container
called jekyll_test from the image, and ran it.
Notice that the shared directory is mounted in the container at ~/jekyll_test.
$ podman run --interactive --tty \
  --name jekyll_test \
  --volume /home/$(whoami)/jekyll_test:/mnt \
  ubuntu:22.04
Here is proof that Ruby is not provided by default in the Ubuntu image, so it is also not present in the new container (yet).
Notice that the prompt has changed because the ‑‑interactive ‑‑tty options were used for the
podman run command above.
The changed prompt emphasizes that the shell is connected to the container:
root@3339a4f91fcc:/# ruby --version
bash: ruby: command not found

root@3339a4f91fcc:/# rbenv
bash: rbenv: command not found
Apt has never been run in this container,
so it needs to learn the available packages:
$ apt update
Get:1 http://archive.ubuntu.com/ubuntu jammy InRelease [270 kB]
Get:2 http://security.ubuntu.com/ubuntu jammy-security InRelease [110 kB]
Get:3 http://archive.ubuntu.com/ubuntu jammy-updates InRelease [109 kB]
Get:4 http://archive.ubuntu.com/ubuntu jammy-backports InRelease [90.7 kB]
Get:5 http://archive.ubuntu.com/ubuntu jammy/universe amd64 Packages [17.5 MB]
Get:6 http://archive.ubuntu.com/ubuntu jammy/multiverse amd64 Packages [266 kB]
Get:7 http://archive.ubuntu.com/ubuntu jammy/restricted amd64 Packages [164 kB]
Get:8 http://archive.ubuntu.com/ubuntu jammy/main amd64 Packages [1792 kB]
Get:9 http://archive.ubuntu.com/ubuntu jammy-updates/universe amd64 Packages [20.3 kB]
Get:10 http://archive.ubuntu.com/ubuntu jammy-updates/restricted amd64 Packages [61.3 kB]
Get:11 http://archive.ubuntu.com/ubuntu jammy-updates/main amd64 Packages [72.0 kB]
Get:12 http://security.ubuntu.com/ubuntu jammy-security/restricted amd64 Packages [61.3 kB]
Get:13 http://security.ubuntu.com/ubuntu jammy-security/main amd64 Packages [66.2 kB]
Get:14 http://security.ubuntu.com/ubuntu jammy-security/universe amd64 Packages [13.7 kB]
Fetched 20.6 MB in 2s (9102 kB/s)
Reading package lists... Done
Building dependency tree... Done
Reading state information... Done
All packages are up to date.
Now Git, ruby-full and rbenv can be installed.
Ubuntu 23.04 (Lunar Lobster) Update:
libyaml-dev must be specified or psych,
which is a transitive dependency of debug,
will not be able to be installed.
root@3339a4f91fcc:/# apt install git rbenv ruby-full libyaml-dev
Reading package lists... Done
Building dependency tree... Done
Reading state information... Done
The following additional packages will be installed:
  binutils binutils-common binutils-x86-64-linux-gnu build-essential bzip2 ca-certificates cpp cpp-11 curl dirmngr
  dpkg-dev fakeroot fontconfig-config fonts-dejavu-core fonts-lato g++ g++-11 gcc gcc-11 gcc-11-base gnupg gnupg-l10n
  gnupg-utils gpg gpg-agent gpg-wks-client gpg-wks-server gpgconf gpgsm icu-devtools javascript-common
  libalgorithm-diff-perl libalgorithm-diff-xs-perl libalgorithm-merge-perl libasan6 libassuan0 libatomic1 libbinutils
  libbrotli1 libbsd0 libc-dev-bin libc-devtools libc6-dev libcc1-0 libcrypt-dev libctf-nobfd0 libctf0 libcurl4
  libdeflate0 libdpkg-perl libedit2 libexpat1 libfakeroot libfile-fcntllock-perl libfontconfig1 libfreetype6
  libgcc-11-dev libgd3 libgdbm-compat4 libgdbm6 libgomp1 libicu-dev libicu70 libisl23 libitm1 libjbig0 libjpeg-turbo8
  libjpeg8 libjs-jquery libksba8 libldap-2.5-0 libldap-common liblocale-gettext-perl liblsan0 libmd0 libmpc3 libmpfr6
  libncurses-dev libnghttp2-14 libnpth0 libnsl-dev libperl5.34 libpng16-16 libpsl5 libquadmath0 libreadline-dev
  libreadline8 librtmp1 libruby3.0 libsasl2-2 libsasl2-modules libsasl2-modules-db libsqlite3-0 libsqlite3-dev
  libssh-4 libssl-dev libstdc++-11-dev libtiff5 libtirpc-dev libtsan0 libubsan1 libwebp7 libx11-6 libx11-data libxau6
  libxcb1 libxdmcp6 libxml2 libxml2-dev libxpm4 libxslt1-dev libxslt1.1 libyaml-0-2 linux-libc-dev lto-disabled-list
  make manpages manpages-dev netbase openssl patch perl perl-modules-5.34 pinentry-curses publicsuffix rake
  readline-common rpcsvc-proto ruby ruby-build ruby-net-telnet ruby-rubygems ruby-xmlrpc ruby3.0 rubygems-integration
  ucf unzip xz-utils zip zlib1g-dev
Suggested packages:
  binutils-doc bzip2-doc cpp-doc gcc-11-locales dbus-user-session libpam-systemd pinentry-gnome3 tor debian-keyring
  g++-multilib g++-11-multilib gcc-11-doc gcc-multilib autoconf automake libtool flex bison gdb gcc-doc
  gcc-11-multilib parcimonie xloadimage scdaemon apache2 | lighttpd | httpd glibc-doc git bzr libgd-tools gdbm-l10n
  icu-doc ncurses-doc readline-doc libsasl2-modules-gssapi-mit | libsasl2-modules-gssapi-heimdal libsasl2-modules-ldap
  libsasl2-modules-otp libsasl2-modules-sql sqlite3-doc libssl-doc libstdc++-11-doc pkg-config make-doc man-browser ed
  diffutils-doc perl-doc libterm-readline-gnu-perl | libterm-readline-perl-perl libtap-harness-archive-perl
  pinentry-doc ri ruby-dev git-core bundler
The following NEW packages will be installed:
  binutils binutils-common binutils-x86-64-linux-gnu build-essential bzip2 ca-certificates cpp cpp-11 curl dirmngr
  dpkg-dev fakeroot fontconfig-config fonts-dejavu-core fonts-lato g++ g++-11 gcc gcc-11 gcc-11-base gnupg gnupg-l10n
  gnupg-utils gpg gpg-agent gpg-wks-client gpg-wks-server gpgconf gpgsm icu-devtools javascript-common
  libalgorithm-diff-perl libalgorithm-diff-xs-perl libalgorithm-merge-perl libasan6 libassuan0 libatomic1 libbinutils
  libbrotli1 libbsd0 libc-dev-bin libc-devtools libc6-dev libcc1-0 libcrypt-dev libctf-nobfd0 libctf0 libcurl4
  libdeflate0 libdpkg-perl libedit2 libexpat1 libfakeroot libfile-fcntllock-perl libfontconfig1 libfreetype6
  libgcc-11-dev libgd3 libgdbm-compat4 libgdbm6 libgomp1 libicu-dev libicu70 libisl23 libitm1 libjbig0 libjpeg-turbo8
  libjpeg8 libjs-jquery libksba8 libldap-2.5-0 libldap-common liblocale-gettext-perl liblsan0 libmd0 libmpc3 libmpfr6
  libncurses-dev libnghttp2-14 libnpth0 libnsl-dev libperl5.34 libpng16-16 libpsl5 libquadmath0 libreadline-dev
  libreadline8 librtmp1 libruby3.0 libsasl2-2 libsasl2-modules libsasl2-modules-db libsqlite3-0 libsqlite3-dev
  libssh-4 libssl-dev libstdc++-11-dev libtiff5 libtirpc-dev libtsan0 libubsan1 libwebp7 libx11-6 libx11-data libxau6
  libxcb1 libxdmcp6 libxml2 libxml2-dev libxpm4 libxslt1-dev libxslt1.1 libyaml-0-2 linux-libc-dev lto-disabled-list
  make manpages manpages-dev netbase openssl patch perl perl-modules-5.34 pinentry-curses publicsuffix rake rbenv
  readline-common rpcsvc-proto ruby ruby-build ruby-net-telnet ruby-rubygems ruby-xmlrpc ruby3.0 rubygems-integration
  ucf unzip xz-utils zip zlib1g-dev
0 upgraded, 141 newly installed, 0 to remove and 0 not upgraded.
Need to get 123 MB of archives.
After this operation, 446 MB of additional disk space will be used.
Do you want to continue? [Y/n] Y
... lots of output ...
I needed to take a break and do something else.
To stop the jekyll_test container, type:
$ podman stop jekyll_test
jekyll_test
Just before taking a break, I wanted to list all the containers on this machine, running or not:
$ podman ps -a
CONTAINER ID  IMAGE                            COMMAND               CREATED         STATUS            PORTS       NAMES
3339a4f91fcc  docker.io/library/ubuntu:22.04   bash                  4 days ago      Up 6 seconds ago              jekyll_test
Restarting a Container
A container can be started and stopped. Here is the help message:
$ podman start --help
Start one or more containers

Description:
  Starts one or more containers. The container name or ID can be used.

Usage:
  podman start [options] CONTAINER [CONTAINER...]

Examples:
  podman start --latest
  podman start 860a4b231279 5421ab43b45
  podman start --interactive --attach imageID

Options:
      --all Start all containers regardless of their state or configuration
  -a, --attach Attach container's STDOUT and STDERR
      --detach-keys [a-Z] Select the key sequence for detaching a container. Format is a single character [a-Z] or a comma separated sequence of `ctrl-<value>`, where `<value>` is one of: `a-z`, `@`, `^`, `[`, `\`, `]`, `^` or `_` (default "ctrl-p,ctrl-q")
  -f, --filter stringArray Filter output based on conditions given
  -i, --interactive Keep STDIN open even if not attached
  -l, --latest Act on the latest container podman is aware of
Not supported with the "--remote" flag
--sig-proxy Proxy received signals to the process (default true if attaching, false otherwise)
To restart this container in the foreground and attach the console to a container shell for command-line input,
use the podman start ‑ia option:
$ podman start -ia jekyll_test
To run a Podman container in the background, use the ‑dt option, just like Docker.
Installing Ruby
Following the steps I previously described in Setting Up a Ruby Development Environment,
I added rbenv to PATH like this:
root@3339a4f91fcc:/# echo 'export PATH="$HOME/.rbenv/bin:$PATH"' >> ~/.bashrc %}
Initialize rbenv, and activate it in the current shell:
root@3339a4f91fcc:/# rbenv init
# Load rbenv automatically by appending
# the following to ~/.bashrc:

eval "$(rbenv init -)"

root@3339a4f91fcc:/# eval "$(rbenv init -)" %}
I made a directory for ruby-build and installed it:
root@3339a4f91fcc:/# mkdir -p "$(rbenv root)/plugins"

root@3339a4f91fcc:/# git clone https://github.com/rbenv/ruby-build.git \
  "$(rbenv root)/plugins/ruby-build"
Cloning into '/root/.rbenv/plugins/ruby-build'...
remote: Enumerating objects: 12195, done.
remote: Counting objects: 100% (888/888), done.
remote: Compressing objects: 100% (302/302), done.
remote: Total 12195 (delta 604), reused 773 (delta 529), pack-reused 11307
Receiving objects: 100% (12195/12195), 2.54 MiB | 6.99 MiB/s, done.
Resolving deltas: 100% (8071/8071), done.
Now we can actually install Ruby 3.1.0. This takes about 5 minutes on my super-fast laptop:
root@3339a4f91fcc:/# rbenv install 3.1.0
Downloading ruby-3.1.0.tar.gz...
-> https://cache.ruby-lang.org/pub/ruby/3.1/ruby-3.1.0.tar.gz
Installing ruby-3.1.0...
Installed ruby-3.1.0 to /root/.rbenv/versions/3.1.0

root@3339a4f91fcc:/# rbenv global 3.1.0

root@3339a4f91fcc:/# rbenv rehash
Now gems can be installed into the currently active Ruby instance.
root@3339a4f91fcc:/# gem install bundler rake rspec rubocop
Fetching bundler-2.3.12.gem
Successfully installed bundler-2.3.12
Parsing documentation for bundler-2.3.12
Installing ri documentation for bundler-2.3.12
Done installing documentation for bundler after 0 seconds
Successfully installed rake-13.0.6
Parsing documentation for rake-13.0.6
Installing ri documentation for rake-13.0.6
Done installing documentation for rake after 0 seconds
Fetching rspec-core-3.11.0.gem
Fetching rspec-expectations-3.11.0.gem
Fetching diff-lcs-1.5.0.gem
Fetching rspec-3.11.0.gem
Fetching rspec-mocks-3.11.1.gem
Fetching rspec-support-3.11.0.gem
Successfully installed rspec-support-3.11.0
Successfully installed diff-lcs-1.5.0
Successfully installed rspec-mocks-3.11.1
Successfully installed rspec-expectations-3.11.0
Successfully installed rspec-core-3.11.0
Successfully installed rspec-3.11.0
Parsing documentation for rspec-support-3.11.0
Installing ri documentation for rspec-support-3.11.0
Parsing documentation for diff-lcs-1.5.0
Installing ri documentation for diff-lcs-1.5.0
Parsing documentation for rspec-mocks-3.11.1
Installing ri documentation for rspec-mocks-3.11.1
Parsing documentation for rspec-expectations-3.11.0
Installing ri documentation for rspec-expectations-3.11.0
Parsing documentation for rspec-core-3.11.0
Installing ri documentation for rspec-core-3.11.0
Parsing documentation for rspec-3.11.0
Installing ri documentation for rspec-3.11.0
Done installing documentation for rspec-support, diff-lcs, rspec-mocks, rspec-expectations, rspec-core, rspec after 4 seconds
Fetching unicode-display_width-2.1.0.gem
Fetching rainbow-3.1.1.gem
Fetching regexp_parser-2.3.1.gem
Fetching rubocop-ast-1.17.0.gem
Fetching ruby-progressbar-1.11.0.gem
Fetching parser-3.1.2.0.gem
Fetching ast-2.4.2.gem
Fetching parallel-1.22.1.gem
Fetching rubocop-1.28.2.gem
Successfully installed unicode-display_width-2.1.0
Successfully installed ruby-progressbar-1.11.0
Successfully installed ast-2.4.2
Successfully installed parser-3.1.2.0
Successfully installed rubocop-ast-1.17.0
Successfully installed regexp_parser-2.3.1
Successfully installed rainbow-3.1.1
Successfully installed parallel-1.22.1
Successfully installed rubocop-1.28.2
Parsing documentation for unicode-display_width-2.1.0
Installing ri documentation for unicode-display_width-2.1.0
Parsing documentation for ruby-progressbar-1.11.0
Installing ri documentation for ruby-progressbar-1.11.0
Parsing documentation for ast-2.4.2
Installing ri documentation for ast-2.4.2
Parsing documentation for parser-3.1.2.0
Installing ri documentation for parser-3.1.2.0
Parsing documentation for rubocop-ast-1.17.0
Installing ri documentation for rubocop-ast-1.17.0
Parsing documentation for regexp_parser-2.3.1
Installing ri documentation for regexp_parser-2.3.1
Parsing documentation for rainbow-3.1.1
Installing ri documentation for rainbow-3.1.1
Parsing documentation for parallel-1.22.1
Installing ri documentation for parallel-1.22.1
Parsing documentation for rubocop-1.28.2
Installing ri documentation for rubocop-1.28.2
Done installing documentation for unicode-display_width, ruby-progressbar, ast, parser, rubocop-ast, regexp_parser, rainbow, parallel, rubocop after 29 seconds
17 gems installed
Jekyll processes can now be launched in the Podman container, as I previously discussed.
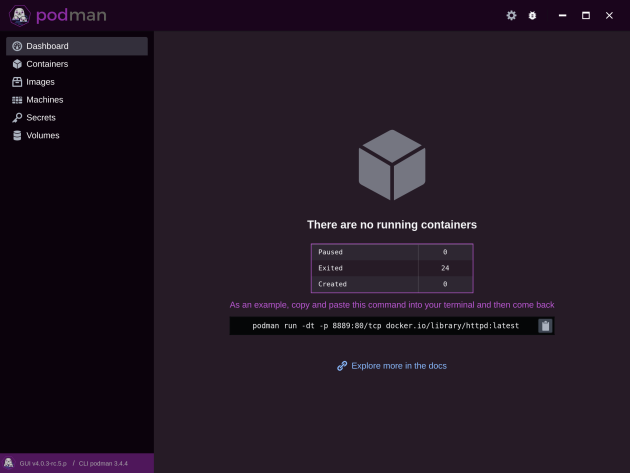
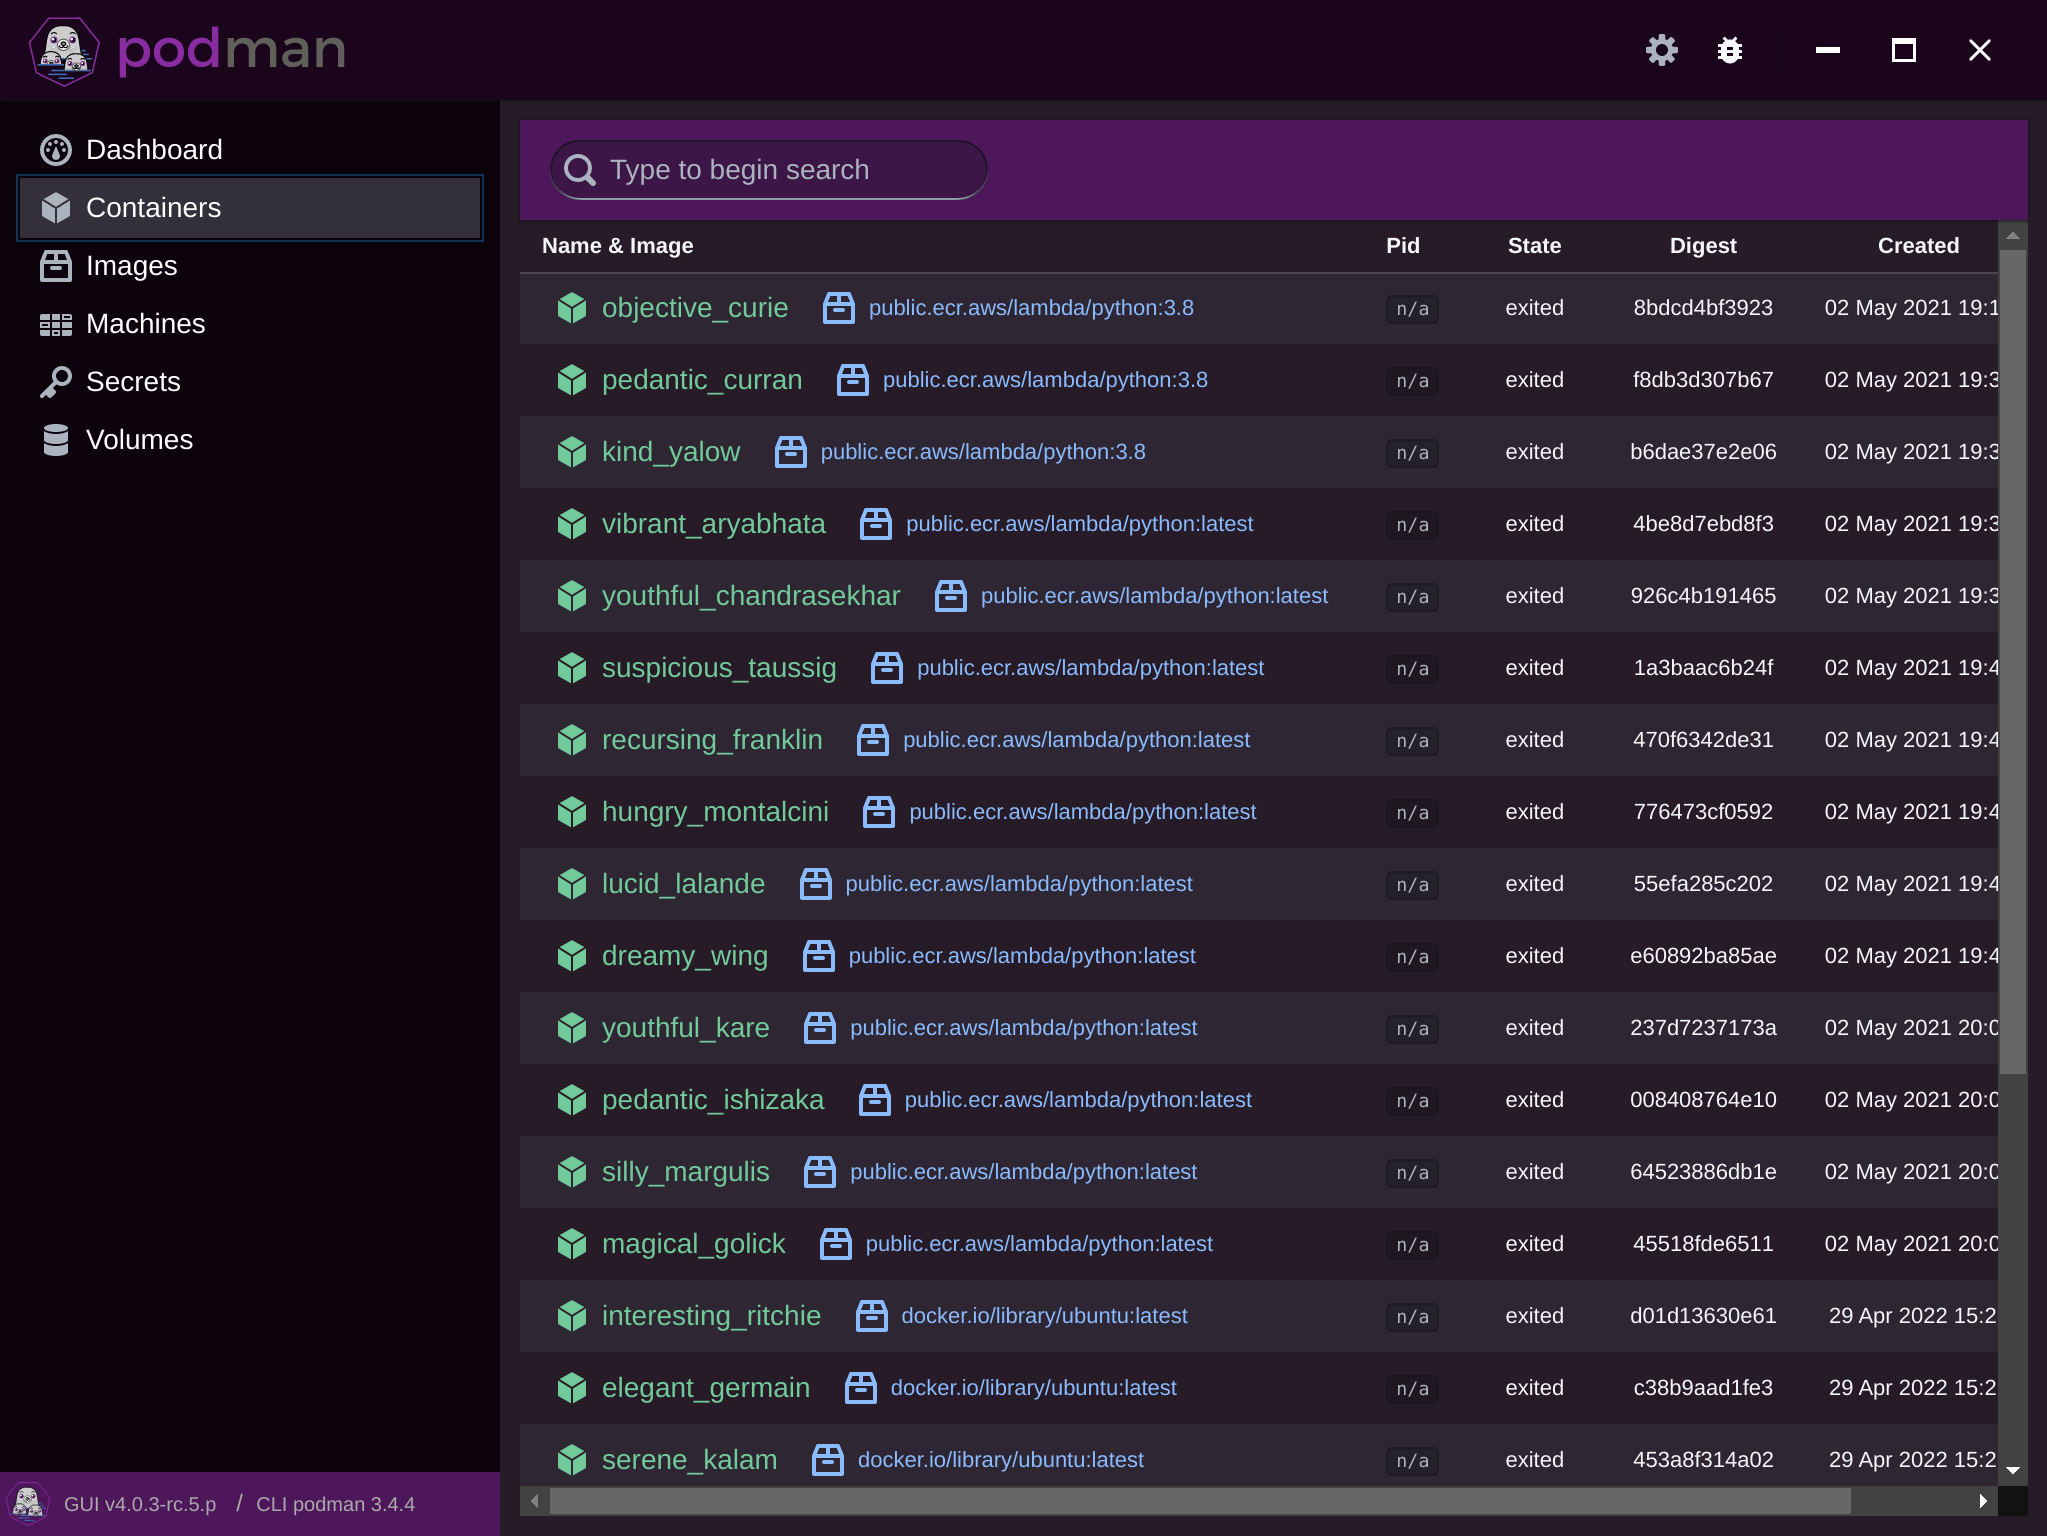
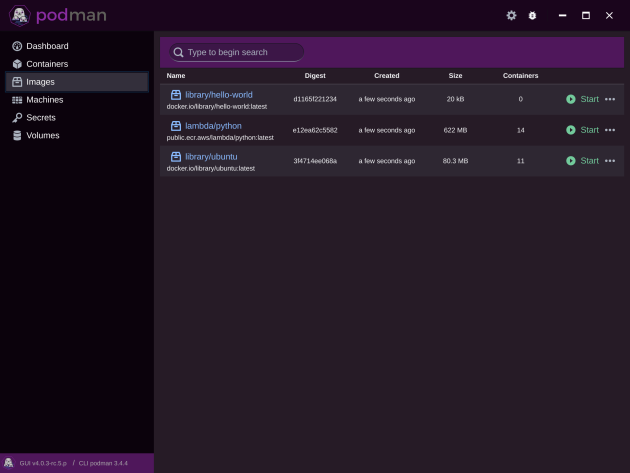
Podman Desktop Companion
The Podman Desktop Companion is a very new program that allows you to control Podman using a GUI instead of a command line. I downloaded and early version from GitHub as a release:
$ wget -O ~/Downloads/podman-desktop-companion-amd64-4.0.3-rc.5.deb \
  https://github.com/iongion/podman-desktop-companion/releases/download/4.0.3-rc.5/podman-desktop-companion-amd64-4.0.3-rc.5.deb
Now I installed Podman Desktop Companion. This is the same for native Ubuntu and WSL/WSL2:
$ sudo dpkg -i ~/Downloads/podman-desktop-companion-amd64-4.0.3-rc.5.deb
Selecting previously unselected package podman-desktop-companion.
(Reading database ... 114566 files and directories currently installed.)
Preparing to unpack .../podman-desktop-companion-amd64-4.0.3-rc.5.deb ...
Unpacking podman-desktop-companion (4.0.3-rc.5) ...
Setting up podman-desktop-companion (4.0.3-rc.5) ...
Processing triggers for mailcap (3.70+nmu1ubuntu1) ...
Processing triggers for gnome-menus (3.36.0-1ubuntu3) ...
Processing triggers for desktop-file-utils (0.26-1ubuntu3) ...
Processing triggers for hicolor-icon-theme (0.17-2) ...
When I ran the Podman Desktop Companion lots of serious-looking error messages appeared on my WSL2 console.
$ podman-desktop-companion &
[16383:0429/150603.405955:ERROR:bus.cc(397)] Failed to connect to the bus: Failed to connect to socket /run/dbus/system_bus_socket: No such file or directory
[16383:0429/150603.406087:ERROR:bus.cc(397)] Failed to connect to the bus: Failed to connect to socket /run/dbus/system_bus_socket: No such file or directory
[16383:0429/150603.410584:ERROR:bus.cc(397)] Failed to connect to the bus: Could not parse server address: Unknown address type (examples of valid types are "tcp" and on UNIX "unix")
[16383:0429/150603.410655:ERROR:bus.cc(397)] Failed to connect to the bus: Could not parse server address: Unknown address type (examples of valid types are "tcp" and on UNIX "unix")
[16411:0429/150603.560734:ERROR:angle_platform_impl.cc(44)] Display.cpp:966 (initialize): ANGLE Display::initialize error 12289: OpenGL ES 2.0 is not supportable.
[16411:0429/150603.561041:ERROR:gl_surface_egl.cc(808)] EGL Driver message (Critical) eglInitialize: OpenGL ES 2.0 is not supportable.
[16411:0429/150603.561256:ERROR:gl_surface_egl.cc(1430)] eglInitialize OpenGL failed with error EGL_NOT_INITIALIZED, trying next display type
[16411:0429/150603.565556:ERROR:angle_platform_impl.cc(44)] Display.cpp:966 (initialize): ANGLE Display::initialize error 12289: Could not create a backing OpenGL context.
[16411:0429/150603.565793:ERROR:gl_surface_egl.cc(808)] EGL Driver message (Critical) eglInitialize: Could not create a backing OpenGL context.
[16411:0429/150603.566024:ERROR:gl_surface_egl.cc(1430)] eglInitialize OpenGLES failed with error EGL_NOT_INITIALIZED
[16411:0429/150603.566214:ERROR:gl_ozone_egl.cc(20)] GLSurfaceEGL::InitializeOneOff failed.
[16411:0429/150603.568594:ERROR:viz_main_impl.cc(188)] Exiting GPU process due to errors during initialization
[16383:0429/150603.680394:ERROR:bus.cc(397)] Failed to connect to the bus: Could not parse server address: Unknown address type (examples of valid types are "tcp" and on UNIX "unix")
[16428:0429/150603.877825:ERROR:angle_platform_impl.cc(44)] Display.cpp:966 (initialize): ANGLE Display::initialize error 12289: OpenGL ES 2.0 is not supportable.
[16428:0429/150603.878162:ERROR:gl_surface_egl.cc(808)] EGL Driver message (Critical) eglInitialize: OpenGL ES 2.0 is not supportable.
[16428:0429/150603.878412:ERROR:gl_surface_egl.cc(1430)] eglInitialize OpenGL failed with error EGL_NOT_INITIALIZED, trying next display type
[16428:0429/150603.882654:ERROR:angle_platform_impl.cc(44)] Display.cpp:966 (initialize): ANGLE Display::initialize error 12289: Could not create a backing OpenGL context.
[16428:0429/150603.882972:ERROR:gl_surface_egl.cc(808)] EGL Driver message (Critical) eglInitialize: Could not create a backing OpenGL context.
[16428:0429/150603.883179:ERROR:gl_surface_egl.cc(1430)] eglInitialize OpenGLES failed with error EGL_NOT_INITIALIZED
[16428:0429/150603.883404:ERROR:gl_ozone_egl.cc(20)] GLSurfaceEGL::InitializeOneOff failed.
[16428:0429/150603.886468:ERROR:viz_main_impl.cc(188)] Exiting GPU process due to errors during initialization
libva error: vaGetDriverNameByIndex() failed with unknown libva error, driver_name = (null)
[16457:0429/150604.049100:ERROR:sandbox_linux.cc(377)] InitializeSandbox() called with multiple threads in process gpu-process.
[16457:0429/150604.053669:ERROR:gpu_memory_buffer_support_x11.cc(44)] dri3 extension not supported.
[16427:0429/150604.219893:ERROR:command_buffer_proxy_impl.cc(125)] ContextResult::kTransientFailure: Failed to send GpuControl.CreateCommandBuffer.
15:06:04.728 › Checking if native API is running - fail Socket file not present in /tmp/podman-desktop-companion-podman-rest-api.sock
15:06:05.677 › Checking if native API is running - fail Socket file not present in /tmp/podman-desktop-companion-podman-rest-api.sock
However, the program started up and seemed to do reasonable things.
I found that it was disappointing to work on a program that did not have a window manager associated with it. That meant the window was fixed in position and size, in the middle of my desktop.
I then started up GWSL and relaunched podman-desktop-companion.
I had expected podman-desktop-companion to become more responsive, but it did not.
After participating in a GitHub issue discussion
I learned that a new version, specially designed for WSL, just became available.
4.1.0-rc.11 – normally it should be able to recognize both environments or let you customize.
Install the one native for Windows.I just released it and I would need a hand to test a bit if you are kind.
For the Windows app to be able to connect to WSL Ubuntu podman socket api, I am using relaying so you will need to install
socat in the distribution before starting Podman Desktop Companion.$ sudo apt-get install socat
I look forward to trying the new version.
]]>